
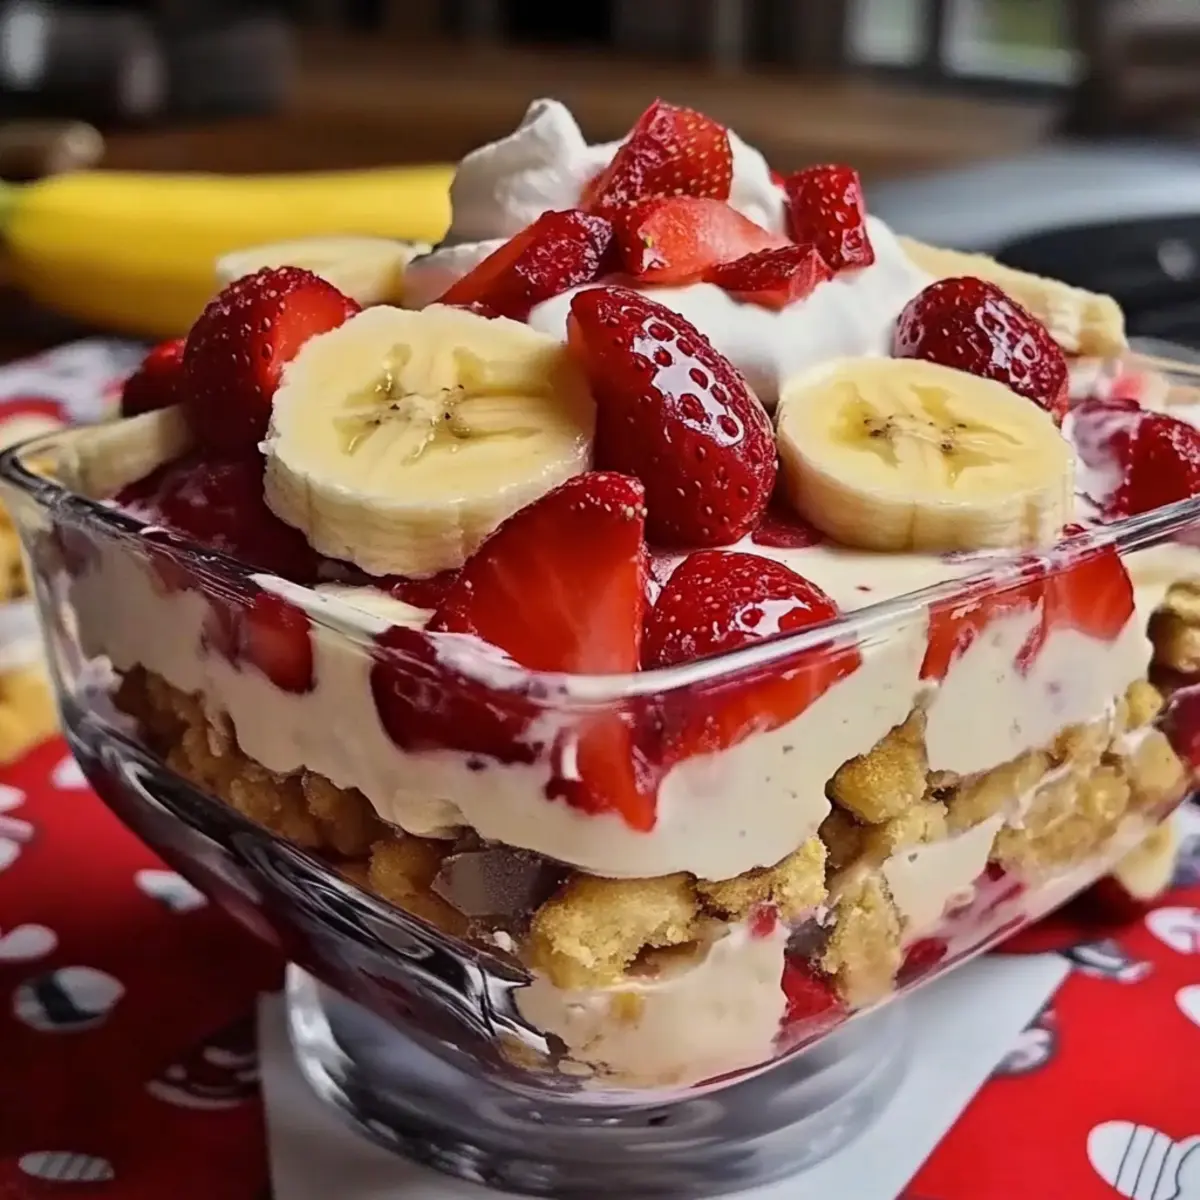
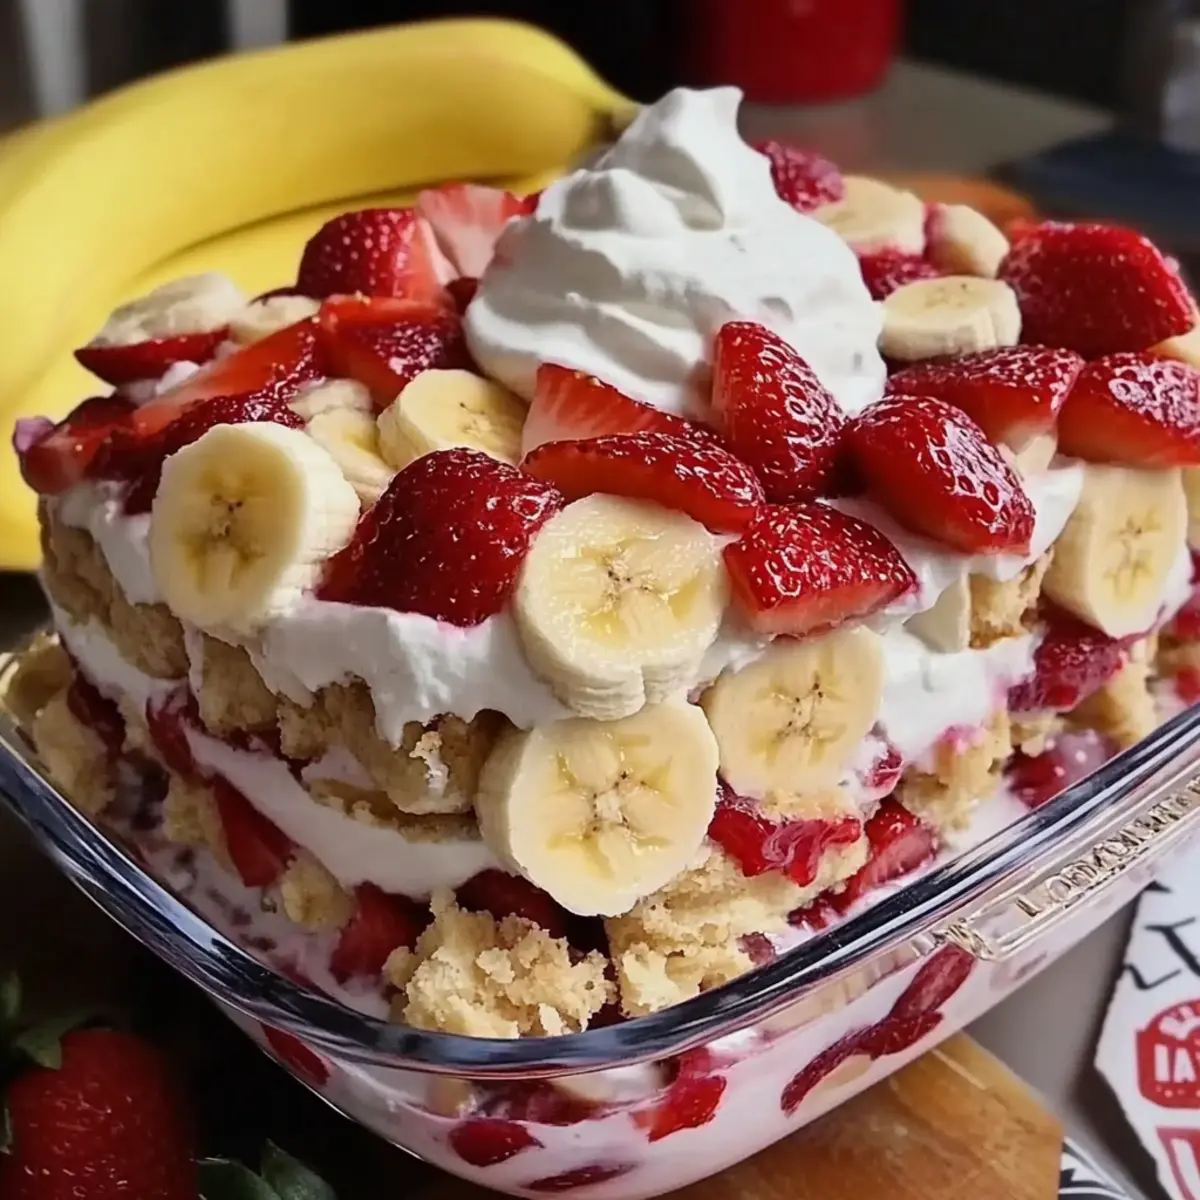
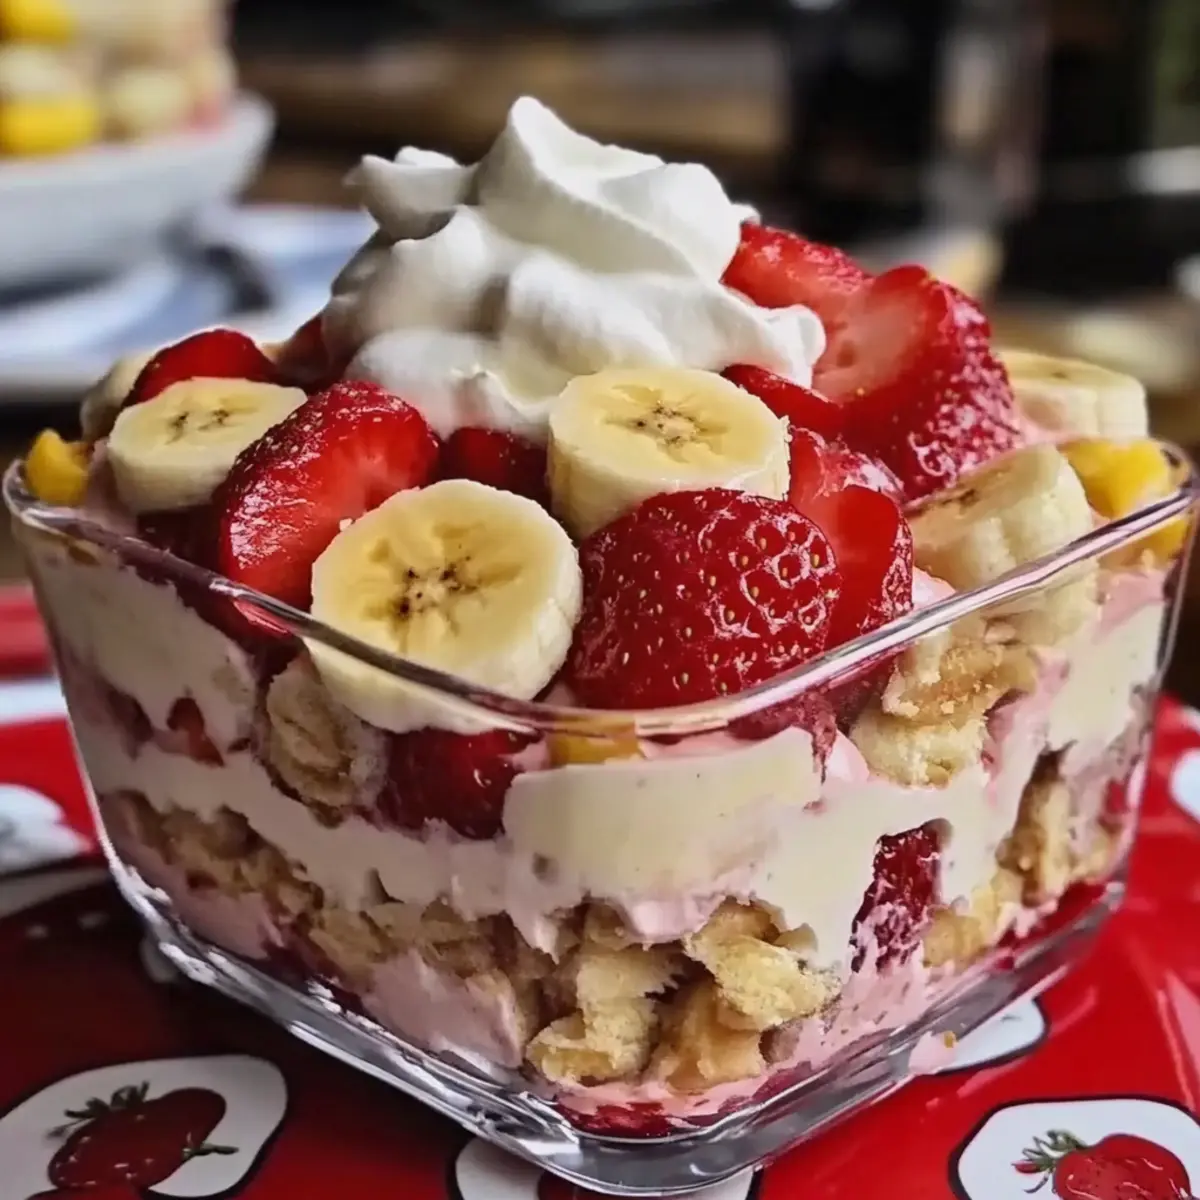
As the sun dips below the horizon, I find myself craving something light yet indulgent—a dessert that whispers sweet memories of warm summers and backyard barbecues. Enter the No-Bake Strawberry Banana Pudding Dream, a delightful concoction that’s as simple to make as it is to savor. In just 20 minutes, you can layer fresh strawberries, ripe bananas, and creamy pudding into a heavenly treat that’s not only vegetarian but also a guaranteed crowd-pleaser. This dessert is perfect for potlucks or those spontaneous moments when you need a sweet escape without the fuss of baking. Ready to elevate your dessert game and impress your friends with this refreshing layered masterpiece? Let’s dive in!
Why Is This Pudding Dream Irresistible?
Simplicity, This no-bake dessert requires only 20 minutes of prep, making it perfect for weeknight cravings or last-minute gatherings. Layered Delight: Each bite features a delicious combination of ripe bananas and juicy strawberries artfully arranged with creamy pudding and crunchy vanilla wafers. Customizable: Feel free to swap in other fruits or even add a touch of chocolate for a personal twist, as I did with my Strawberry Crunch Cookies. Light and Fluffy: The airy whipped topping gives it a luscious finish that feels indulgent yet light. Crowd-Pleaser: Whether at a potluck or family dinner, this dessert is sure to leave everyone wanting more!
Strawberry Banana Pudding Dream Ingredients
• The key to this delightful dessert lies in these simple yet flavorful components!
For the Pudding
- Cream Cheese – Adds creaminess and structure to the pudding; substitute with Greek yogurt or dairy-free cream cheese for a lighter option.
- Sweetened Condensed Milk – Provides sweetness and thickness, a key component for that rich flavor; reducing the amount will make it less sweet.
- French Vanilla Pudding Mix – The heart of the dessert, bringing flavor and consistency; opt for a sugar-free version for a lower-calorie treat.
- Milk – Blends with pudding mix and cream cheese for a smooth texture; any milk variety (like almond or oat) can be used as a substitute.
For the Layers
- Vanilla Wafers – Acts as the dessert’s crunchy base layer; gluten-free vanilla wafers can be used for a gluten-free option.
- Bananas (6-8, sliced) – Adds natural sweetness and vibrant flavor; ensuring they are ripe is key for the best taste.
- Strawberries (1 container) – Offers freshness and acidity to balance the sweetness of the pudding; frozen strawberries are a good alternative if thawed and drained properly.
For the Topping
- Whipped Topping (1 container) – Adds a light, fluffy finish; replace with homemade whipped cream for a richer flavor.
Dive into the layers of this Strawberry Banana Pudding Dream and bring a touch of homemade bliss to your table!
Step‑by‑Step Instructions for Strawberry Banana Pudding Dream
Step 1: Mix the Creamy Base
In a medium mixing bowl, combine 8 oz of softened cream cheese and 14 oz of sweetened condensed milk. Beat with an electric mixer on medium speed for about 2-3 minutes until the mixture is smooth and creamy, with no lumps remaining. This forms the luscious base for your Strawberry Banana Pudding Dream, so make sure it’s well blended.
Step 2: Incorporate the Pudding Mix
Once the cream mixture is smooth, add 3.4 oz of French vanilla pudding mix and 1 cup of milk to the bowl. Mix on medium speed for 2-3 minutes until the pudding thickens and becomes creamy. You’ll see the consistency change; it should appear smooth and thick—perfectly ready to layer into your dessert.
Step 3: Prepare the Layers
Take a large serving dish or trifle bowl and begin layering. Start by arranging a single layer of vanilla wafers at the bottom. Make sure they’re evenly distributed, creating a solid base that will add a delightful crunch, which will pair wonderfully with the creamy layers of your Strawberry Banana Pudding Dream.
Step 4: Add the Fresh Fruit
Next, place a generous layer of sliced ripe bananas and fresh strawberries over the vanilla wafers. Use about 2-3 bananas and a full container of strawberries, ensuring you cover the wafers entirely. The vibrant colors of the fruit will start to create a beautiful visual contrast and add natural sweetness to the layers.
Step 5: Pour in the Creamy Mixture
Now, carefully pour half of the prepared pudding mixture over the fruit layer. Use a spatula to spread it evenly so it covers the fruit and cookies completely. This creamy layer brings together all the flavors and textures, making each bite of your Strawberry Banana Pudding Dream a delightful combination.
Step 6: Repeat the Layering Process
For the second layer, repeat the process by adding more vanilla wafers, followed by another layer of sliced bananas and strawberries. Then, pour the remaining pudding mixture over the second layer of fruit. Make sure to spread it evenly once again, ensuring a beautifully combined dessert that’s packed with flavor.
Step 7: Top it Off
Finally, spread 8 oz of whipped topping over the last layer of pudding, smoothing it out to create a beautiful finish. If you’d like, you can garnish with a few sliced strawberries on top for an eye-catching presentation. This will add a charming touch of freshness to your Strawberry Banana Pudding Dream.
Step 8: Chill and Serve
Cover the dessert tightly with plastic wrap and refrigerate for at least 4 hours, but if possible, let it chill overnight. This allows the flavors to meld beautifully and the pudding to set. When ready to serve, scoop out portions of this delightful no-bake dessert and enjoy the layers of creamy goodness!
How to Store and Freeze Strawberry Banana Pudding Dream
Fridge: Keep your Strawberry Banana Pudding Dream tightly covered with plastic wrap or in an airtight container; it stays fresh for up to 3 days.
Freezer: While it’s best enjoyed fresh, you can freeze portions for later. Wrap servings tightly in plastic wrap and foil, storing for up to 1 month. Thaw in the fridge overnight before serving.
Reheating: This dessert is best served chilled, so no need to reheat. Just enjoy its refreshing layers straight from the fridge!
Expert Tips for Strawberry Banana Pudding Dream
- Select Ripe Fruits: Use ripe bananas and fresh strawberries for optimal sweetness and flavor in your pudding layers. Underripe fruits won’t provide the same rich taste.
- Layering Technique: When layering, press gently on the fruits and wafers to ensure they absorb some of the creamy pudding mixture, enhancing flavor in your Strawberry Banana Pudding Dream.
- Make Ahead: For the best flavor and texture, prepare the pudding a day in advance. This extra time allows the layers to meld beautifully.
- Storage Tips: Keep any leftovers tightly covered in the refrigerator. Consume within three days to maintain freshness and prevent the fruit from browning.
- Be Mindful of Moisture: If using frozen strawberries, make sure to drain them well to avoid excess moisture, which can make the pudding watery.
What to Serve with Strawberry Banana Pudding Dream
Elevate your dessert experience by pairing this delightful creation with complementary sides and sips that enhance its vibrant flavors.
- Fresh Fruit Salad: Bright and colorful, a fruit salad can add more seasonal sweetness and a crispy texture that contrasts beautifully with the creamy pudding.
- Honey Drizzled Biscuits: Serve alongside buttery biscuits drizzled with honey for a touch of warmth that harmonizes the cold pudding’s texture. They offer a lovely dip-and-scoop option.
- Chocolate Dipped Strawberries: An elegant touch, these sweet and decadent bites create an indulgent pairing that enhances the strawberries’ flavor in the pudding.
- Coconut Whipped Cream: A delightful twist on traditional whipped topping, homemade coconut whipped cream adds a tropical flair and creaminess that harmonizes with the pudding’s lightness.
- Iced Tea or Lemonade: Refreshing beverages like sweet iced tea or zesty lemonade can cleanse your palate while pairing perfectly with the fruity dessert. Their brightness complements the pudding’s creaminess.
- Vanilla Ice Cream: A scoop of vanilla ice cream elevates every bite, offering a rich, creamy texture that’s a classic match for the Strawberry Banana Pudding Dream. This combo feels indulgent yet refreshing.
- Granola or Nut Crunch: Sprinkle some granola or crushed nuts for added texture and a nutty flavor that contrasts with the pudding’s smooth layers—an unexpected delight!
Make Ahead Options
These Strawberry Banana Pudding Dreams are a fantastic make-ahead dessert for busy weeknights or gatherings! You can prepare the creamy pudding mixture (steps 1 and 2) up to 24 hours in advance and refrigerate it in an airtight container to maintain its smooth texture. Additionally, you can layer the vanilla wafers, bananas, and strawberries ahead of time and keep the assembled dessert covered in the fridge for up to 3 days. Just be sure to add the whipped topping right before serving to keep it fresh and fluffy. This way, you can savor the deliciousness of your Strawberry Banana Pudding Dream with minimal effort when it’s time to enjoy!
Strawberry Banana Pudding Dream Variations
Customize this delightful pudding for a unique twist that will tantalize your taste buds!
-
Fruit Swap: Replace strawberries and bananas with blueberries or peaches for a seasonal delight. Each fruit brings its own burst of flavor!
-
Nuts Galore: Substitute vanilla wafers with crushed nuts or granola to add a delightful crunch. This twist introduces a nutty texture that perfectly complements the creaminess.
-
Chocolate Layer: Add chocolate pudding mix or drizzle melted chocolate in between layers for a decadent twist. Imagine the rich taste of chocolate dancing with fruity flavors!
-
Coconut Cream: Replace whipped topping with coconut whipped cream for a tropical vibe. This airy alternative adds a hint of coconut that’s simply divine.
-
Sugar-Free Option: Use sugar-free pudding mix and sweetened condensed milk to lighten the calories without sacrificing taste. Enjoy a guilt-free version that still satisfies.
-
Dairy-Free Delight: For a dairy-free version, swap cream cheese with cashew cream and use almond milk. This variation is just as creamy and rich, making it perfect for everyone.
-
Spiced Flavor: Sprinkle a dash of cinnamon or nutmeg in the pudding mix for a warm, spiced twist. These warm spices add depth to the dessert’s flavors.
-
Zesty Touch: Mix in a hint of lemon or orange zest into the pudding base for a refreshing citrus twist. This bright flavor enhances the overall experience, making it even more refreshing.
These variations offer endless possibilities for your Strawberry Banana Pudding Dream! You can even draw inspiration from my Vanilla Pudding Pumpkin or the Free Blender Banana for alternatives that still feel indulgent. Enjoy experimenting!

Strawberry Banana Pudding Dream Recipe FAQs
What type of bananas should I use for the best flavor?
Absolutely! For your Strawberry Banana Pudding Dream, opt for ripe bananas—they should be yellow with a few brown spots. This means they are sweet and will blend perfectly with the creaminess of the pudding. Underripe bananas may not provide the same level of sweetness and flavor.
How should I store my Strawberry Banana Pudding Dream?
Keep your dessert tightly covered with plastic wrap or in an airtight container in the refrigerator. It’ll stay fresh for up to 3 days. This not only helps retain its flavors but also prevents the fruits from browning. If you’ve made it ahead of time, it tastes even better the next day after the flavors meld together!
Can I freeze my Strawberry Banana Pudding Dream?
Yes, while I’d recommend enjoying it fresh for the best texture, you can freeze individual portions. Wrap tightly in plastic wrap and foil to prevent freezer burn, and store for up to 1 month. When you’re ready to enjoy, simply thaw in the fridge overnight. Note that the texture may slightly change after freezing, but it should still be delicious!
What do I do if my pudding is too lumpy?
If your pudding mixture ends up lumpy, don’t worry! Simply transfer it to a blender and blend it for a minute until smooth. Alternatively, you can use a whisk to vigorously mix it while gently heating it on low—this can help dissolve lumps. Just be careful not to overheat it, as you don’t want to cook the pudding!
Is this dessert suitable for those with dairy allergies?
If you’re looking for a dairy-free option, you can customize the Strawberry Banana Pudding Dream! Use dairy-free cream cheese and coconut-based whipped cream as substitutes for a delightful, creamy taste without the dairy. Just double-check that your pudding mix is dairy-free, too, and you’ll have a delicious treat that everyone can enjoy!
Strawberry Banana Pudding Dream: A No-Bake Delight for Everyone
Ingredients
Equipment
Method
- Mix the Creamy Base: Combine 8 oz of softened cream cheese and 14 oz of sweetened condensed milk in a medium mixing bowl. Beat with an electric mixer on medium speed for about 2-3 minutes until smooth.
- Incorporate the Pudding Mix: Add 3.4 oz of French vanilla pudding mix and 1 cup of milk to the bowl. Mix on medium speed for 2-3 minutes until the pudding thickens.
- Prepare the Layers: Arrange a single layer of vanilla wafers at the bottom of a large serving dish.
- Add the Fresh Fruit: Layer sliced ripe bananas and strawberries over the vanilla wafers, covering them completely.
- Pour in the Creamy Mixture: Carefully pour half of the pudding mixture over the fruit layer. Spread it evenly.
- Repeat the Layering Process: Add more vanilla wafers and another layer of bananas and strawberries. Pour the remaining pudding mixture over this layer.
- Top it Off: Spread 8 oz of whipped topping over the last layer of pudding. Garnish with sliced strawberries if desired.
- Chill and Serve: Cover tightly with plastic wrap and refrigerate for at least 4 hours or overnight before serving.
Leave a Reply