
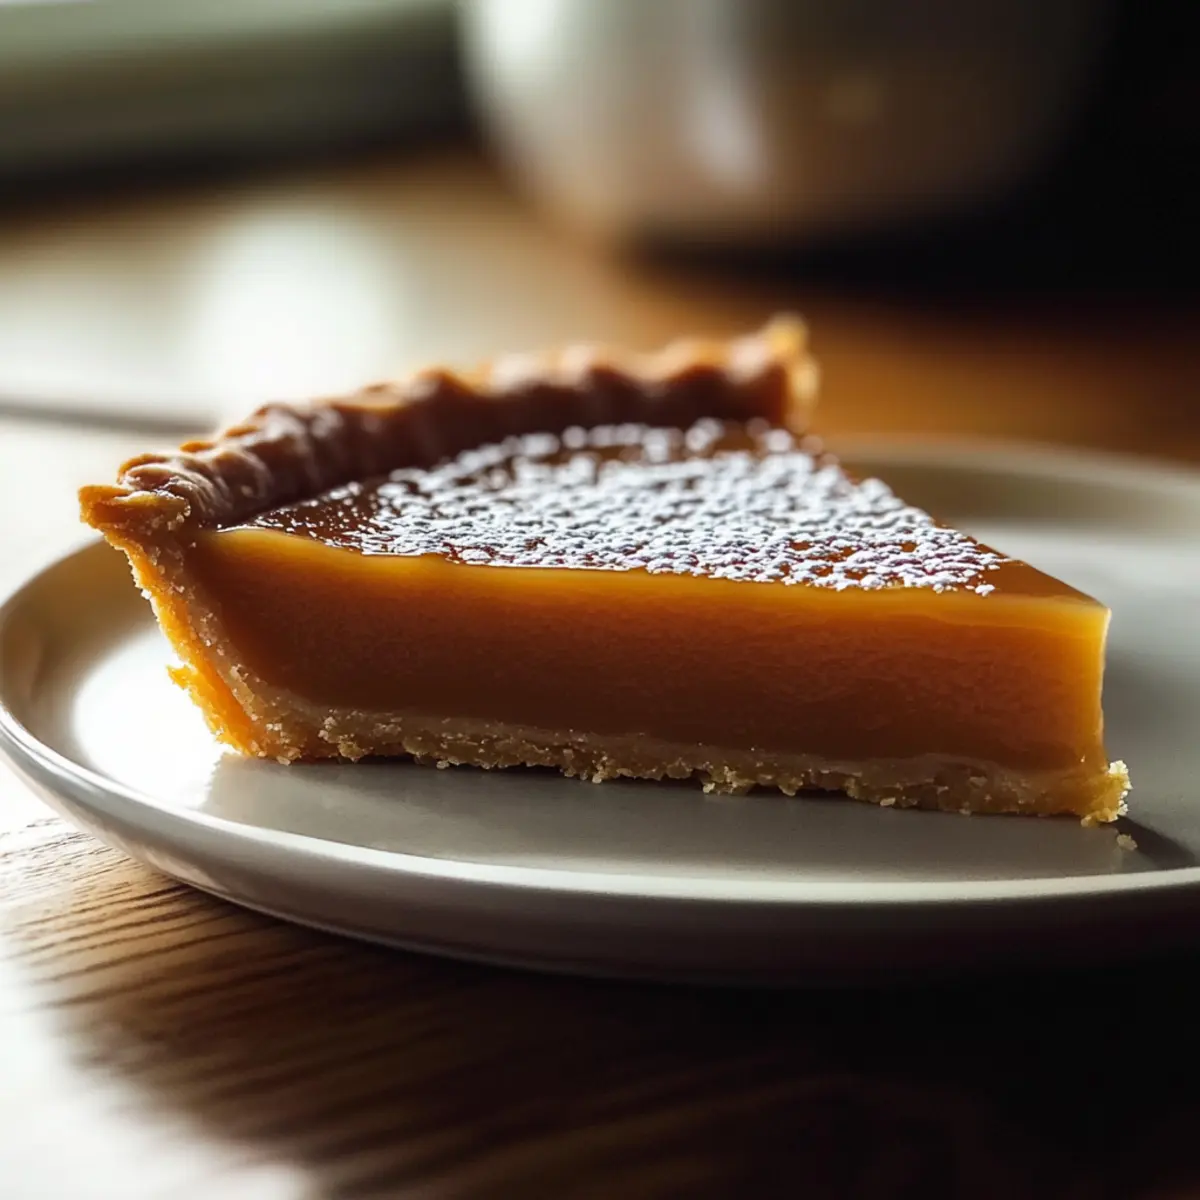
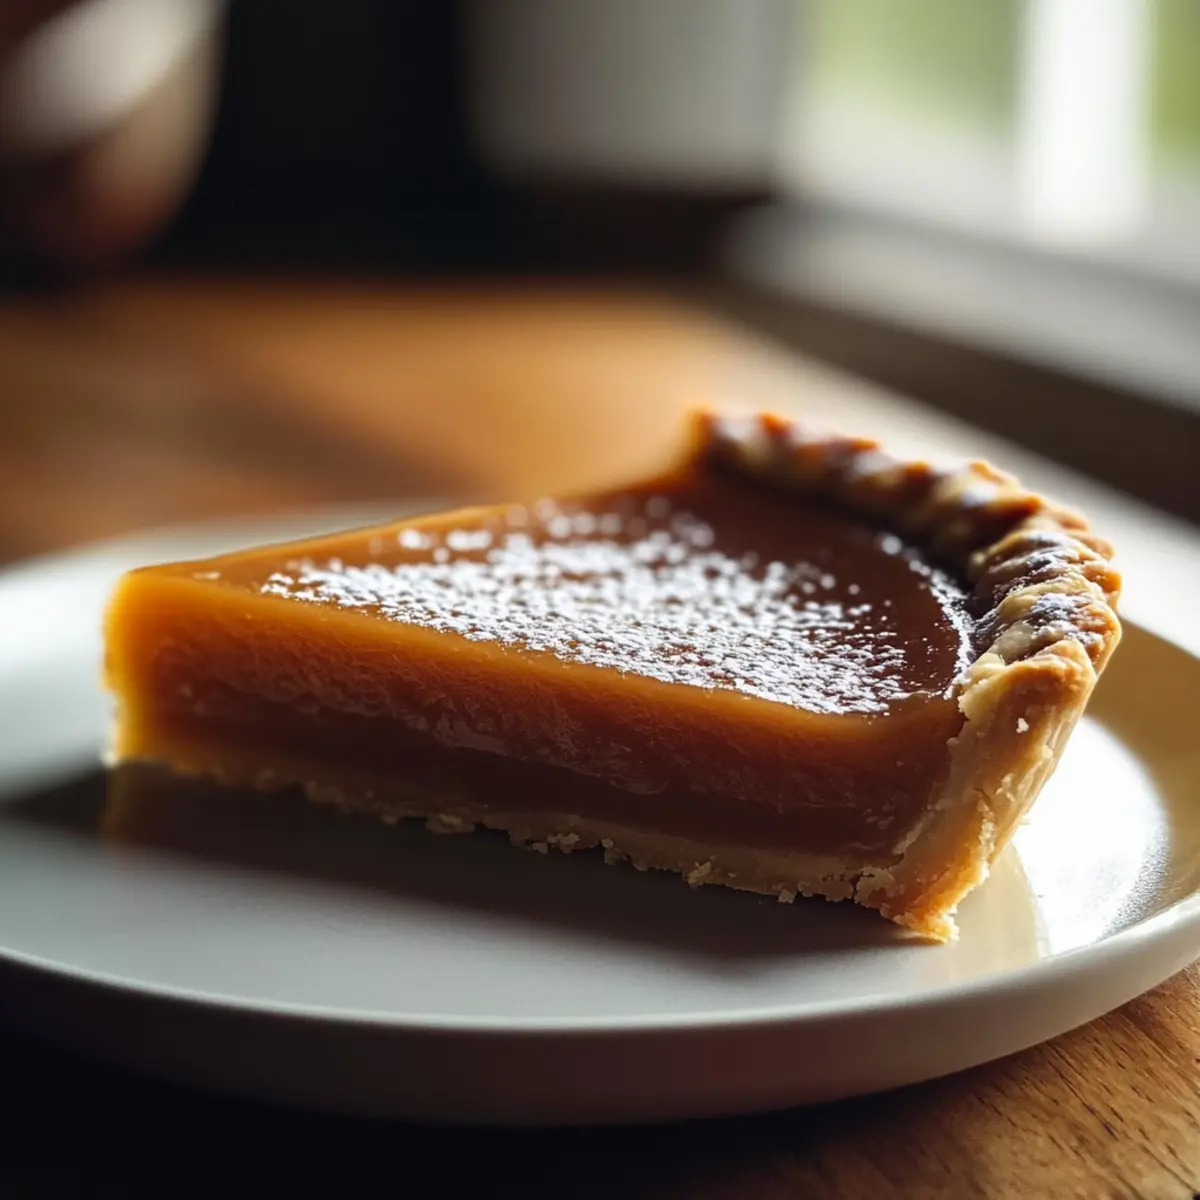
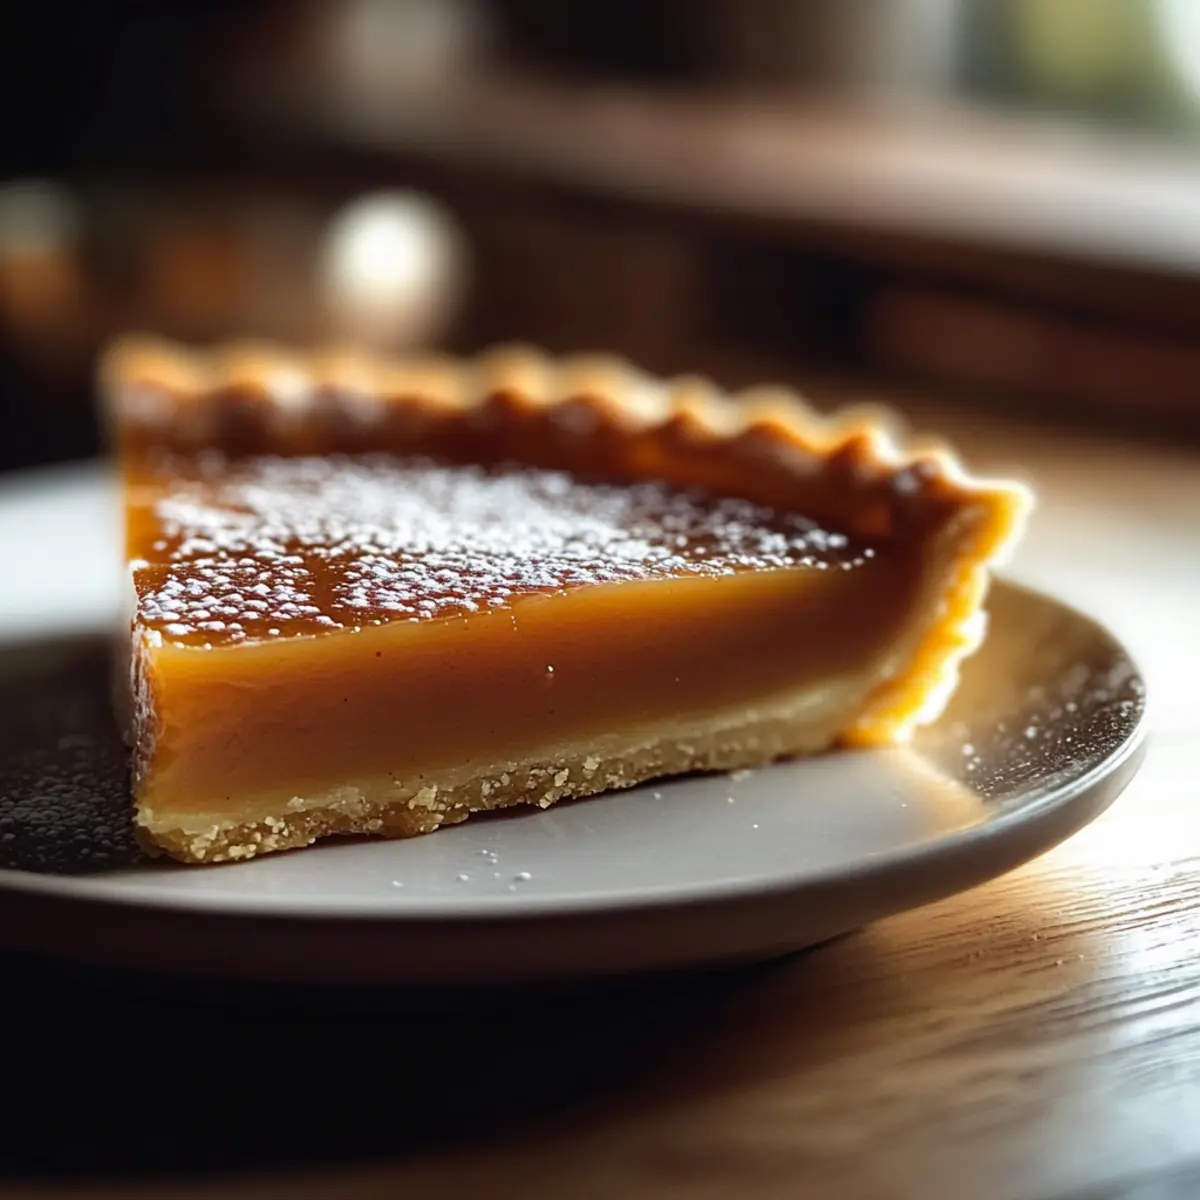
As I unwrapped my childhood memories, the sweet aroma of butterscotch flooded my kitchen, taking me back to those carefree school days. Today, I’m thrilled to share my take on the Classic Mary Berry Butterscotch Tart, a timeless dessert that wraps nostalgia in every bite. This recipe is perfect for anyone seeking a cozy, homemade treat that’s both simple to whip up and indulgently satisfying. Whether you’re needing to impress guests at a dinner party or just craving a slice of nostalgia for yourself, this tart delivers—with an optional twist! Plus, I’ve included adaptations for gluten-free and dairy-free diets, ensuring everyone gets to enjoy this classic dessert. Ready to bring a little comfort to your day? Let’s dive in!
Why is this Butterscotch Tart special?
Nostalgia Awaits: This classic dessert brings back fond memories of school dinners, making it a heartwarming addition to any gathering.
Unbeatable Flavor: The rich butterscotch filling is a delightful balance of sweetness and buttery goodness that’ll have your taste buds dancing.
Versatile Options: With suggestions for gluten-free and dairy-free substitutions, everyone can indulge in this treat.
Simple Preparation: You don’t need to be a master baker to make this tart—just follow easy steps and watch it come together!
Crowd-Pleasing Delight: Whether served at a family dinner or a casual brunch, this tart is sure to impress and satisfy. If you’re looking for more delightful treats, be sure to check out my Strawberry Crunch Cookies or the comforting Onion White Beans.
Mary Berry Butterscotch Tart Ingredients
Delve into the sweet goodness of this classic treat!
For the Pastry Crust
• Butter – 4oz/110g; Richness and flavor that creates a tender crust. For a dairy-free option, substitute with plant-based butter.
• Plain Flour – 8oz/225g; Provides the structure for the pastry. For gluten-free, use a 1:1 gluten-free flour blend.
• Salt – Pinch; Enhances the overall flavor of the crust. No substitutions needed.
• Cold Water – To mix; Aids in binding the pastry together. Use as needed to moisten.
For the Butterscotch Filling
• Demerara Sugar – 10oz/300g; Adds sweetness and a caramel flavor to the filling. Soft brown sugar is a great alternative.
• Milk – 6floz/175ml; Provides the necessary liquid for a creamy filling. Substitute with oat milk for a delicious dairy-free version.
• Plain Flour for Filling – 3oz/75g; Acts as a thickener to create that luscious texture. No substitutions needed.
With these ingredients in hand, you’re one step closer to creating a delightful Mary Berry Butterscotch Tart that captures the essence of nostalgia!
Step‑by‑Step Instructions for Mary Berry Butterscotch Tart
Step 1: Prepare the Crust
In a large mixing bowl, combine 8oz of plain flour and a pinch of salt. Cut in 4oz of butter, using your fingers or a pastry cutter, until the mixture resembles coarse crumbs. Gradually add cold water, mixing just until the dough holds together. Shape the dough into a disk, then wrap it in plastic film. Chill in the refrigerator for 30 minutes to relax the gluten.
Step 2: Blind Bake the Crust
Preheat your oven to 190°C (375°F). Roll out the chilled pastry on a floured surface to fit your tart tin. Carefully transfer the dough into the tin, trimming any excess. Line the pastry with parchment paper, fill it with baking beans, and bake for 15 minutes. Remove the paper and beans, then bake for an additional 10-15 minutes until the crust is lightly golden. Set aside to cool.
Step 3: Make the Filling
In a medium saucepan, melt 4oz of butter over low heat, then add 10oz of demerara sugar. Stir gently until fully dissolved, about 5 minutes. Gradually whisk in 6floz of milk and 3oz of plain flour, combining until smooth. Continue to cook over medium heat, stirring constantly until the mixture thickens, which should take around 5-7 minutes. You’re aiming for a shiny and luscious consistency—this is the star of your Mary Berry Butterscotch Tart!
Step 4: Combine and Fill
Once the filling is thick and creamy, carefully pour it into the cooled pastry shell. Use a spatula to smooth the top, ensuring an even distribution. Let it sit at room temperature for about 10 minutes, which allows the filling to settle nicely before chilling. This step helps prevent any air bubbles and ensures a beautifully finished tart.
Step 5: Chill to Set
Cover the tart with plastic wrap and place it in the refrigerator for at least 2 hours. This chilling time is key for the filling to firm up, giving you that delightful texture characteristic of a classic Mary Berry Butterscotch Tart. Once set, you can remove it from the fridge, ready to serve your nostalgic dessert.
Step 6: Serve with Flair
To serve, you can garnish each slice of the tart with a dollop of whipped cream or a sprinkle of flaky sea salt for an extra touch. Cut into wedges and serve chilled, allowing the rich flavors of the butterscotch to shine through. Your homemade Mary Berry Butterscotch Tart is sure to impress friends and family alike!
What to Serve with Mary Berry Butterscotch Tart
Enhance your dessert experience by pairing this sweet classic with delightful accompaniments that brighten up every bite.
- Fresh Berries: A mix of raspberries and blueberries adds a refreshing tartness that perfectly balances the rich butterscotch flavor.
- Whipped Cream: Light and airy, a generous dollop of whipped cream on top complements the creamy filling of the tart beautifully.
- Flaky Sea Salt: A sprinkle of flaky sea salt enhances the sweet notes, offering a contrast that elevates each delicious slice.
- Coffee or Espresso: Rich coffee brings warmth and depth, making for a cozy pairing that invites relaxed conversation.
- Toasted Nuts: Crushed pecans or walnuts introduce a satisfying crunch, adding both texture and a hint of nuttiness that harmonizes with the tart.
- Chocolate Sauce: A drizzle of chocolate sauce brings a luxurious flair; its bittersweet profile makes a delicious contrast to the sweetness of the tart.
Pairing these elements with the Mary Berry Butterscotch Tart not only enhances the overall flavor but also creates a beautiful presentation, making your dessert truly special.
How to Store and Freeze Mary Berry Butterscotch Tart
Fridge: Store your butterscotch tart in an airtight container in the refrigerator for up to 3 days, ensuring it stays fresh and tasty.
Freezer: If you’d like to prepare ahead, you can freeze the tart for up to 2 months. Wrap it tightly in plastic wrap and then in aluminum foil to protect against freezer burn.
Thawing: To enjoy a frozen Mary Berry Butterscotch Tart, transfer it to the fridge for a few hours or overnight before serving.
Reheating: If desired, warm individual slices gently in the microwave for a few seconds, but enjoy it chilled for the best flavor!
Make Ahead Options
These Mary Berry Butterscotch Tart preparations are perfect for busy weeknights and stress-free gatherings! You can prepare the pastry crust up to 24 hours in advance—simply roll it out, fit it into your tart tin, and refrigerate. The filling can also be made up to 3 days beforehand; just store it in an airtight container in the fridge to keep it fresh. When you’re ready to serve, pour the chilled filling into the pre-baked crust, smooth the top, and let it set in the fridge for at least 2 hours. This ensures your tart remains just as delicious, rich, and creamy, making it a delightful, make-ahead treat!
Mary Berry Butterscotch Tart Variations
Feel free to let your creativity shine by customizing this delectable tart to suit your taste and dietary needs!
-
Gluten-Free: Use a 1:1 gluten-free flour blend in both the crust and filling for a delightful gluten-free treat. This variation ensures everyone can indulge in the comforting flavors of butterscotch.
-
Dairy-Free: Substitute plant-based butter and oat milk in the filling for a deliciously dairy-free version. With this swap, you won’t miss a beat in that rich and creamy texture.
-
Nutty Delight: Top your tart with crushed pecans or walnuts before chilling. The added crunch enhances the overall flavor, creating a beautiful contrast to the smooth filling.
-
Chocolate Twist: Mix in a tablespoon of cocoa powder with the filling for a chocolate-butterscotch fusion. This decadent variation offers a delightful surprise for chocolate lovers.
-
Flavorful Extracts: Experiment by adding a splash of vanilla or almond extract to the filling. These subtle flavor notes can elevate your tart to new heights of deliciousness.
-
Citrus Zest: Adding a teaspoon of lemon or orange zest in the filling creates a refreshing contrast to the butterscotch’s sweetness. It adds a light, zesty punch that’s wonderfully uplifting.
-
Caramel Drizzle: Prior to serving, drizzle warm caramel sauce over each slice for an indulgent touch. It adds a visually appealing finish and intensifies that sweet butterscotch experience.
-
Spicy Kick: For those who love a bit of heat, sprinkle some cayenne pepper or cinnamon into the filling. This unexpected twist creates a warm and intriguing flavor profile.
These variations not only keep your dessert exciting but also ensure that it can be enjoyed by everyone at your table. Speaking of delightful baking, you might also want to check out my Strawberry Crunch Cookies for another sweet treat or the savory Onion White Beans for something hearty!
Expert Tips for Mary Berry Butterscotch Tart
-
Dissolve Sugar Fully: Always ensure the demerara sugar completely dissolves in the butter to prevent a grainy filling in your Butterscotch Tart.
-
Don’t Overwork Dough: Mix your pastry dough just until combined; overworking can make the crust tough and less flaky.
-
Blind Baking Essential: Blind baking the crust is crucial to avoid a soggy bottom. Ensure it’s lightly golden for the best texture.
-
Perfect Chill Time: Allow your tart to cool at room temperature before refrigerating. Chilling it for at least 2 hours ensures that the filling sets beautifully.
-
Creative Variations: Feel free to experiment! Swirl flavors into the filling or add toppings to make your Mary Berry Butterscotch Tart uniquely yours.

Mary Berry Butterscotch Tart Recipe FAQs
What type of flour should I use for the pastry?
For the pastry crust of the Mary Berry Butterscotch Tart, I recommend using plain flour to achieve the perfect flaky texture. If you’re looking for a gluten-free option, a 1:1 gluten-free flour blend works wonderfully as a substitute!
How long can I store the butterscotch tart?
You can store your butterscotch tart in an airtight container in the refrigerator for up to 3 days. It’s a great idea to prepare it one day in advance if you’re hosting, as the flavors meld beautifully overnight.
Can I freeze the Mary Berry Butterscotch Tart?
Absolutely! To freeze the tart, wrap it tightly in plastic wrap and then in aluminum foil. It can be frozen for up to 2 months. When you’re ready to enjoy it, transfer the tart to the fridge for several hours or overnight to thaw before serving.
What should I do if my filling is grainy?
If your filling turns out grainy, it’s likely that the sugar didn’t fully dissolve in the butter. To prevent this, make sure to stir the butter and sugar together over low heat until the sugar is entirely melted and blended before adding the milk.
Are there any dietary considerations for this recipe?
Great question! The Mary Berry Butterscotch Tart contains both gluten and dairy, but you can definitely accommodate dietary restrictions. For a dairy-free option, simply substitute the butter and milk with plant-based alternatives like vegan butter and oat milk. Also, using a gluten-free flour blend will make it suitable for those avoiding gluten.
Can I add any toppings or variations to the tart?
Yes! You can get creative with toppings like crushed pecans or a swirl of whipped cream on top. Flavored extracts like vanilla or almond added to the filling can also enhance the butterscotch flavor, giving you a delightful twist on this classic dessert.
Heavenly Mary Berry Butterscotch Tart for Sweet Nostalgia
Ingredients
Equipment
Method
- In a large mixing bowl, combine 8oz of plain flour and a pinch of salt. Cut in 4oz of butter, using your fingers or a pastry cutter, until the mixture resembles coarse crumbs. Gradually add cold water, mixing just until the dough holds together. Shape the dough into a disk, then wrap it in plastic film. Chill in the refrigerator for 30 minutes to relax the gluten.
- Preheat your oven to 190°C (375°F). Roll out the chilled pastry on a floured surface to fit your tart tin. Carefully transfer the dough into the tin, trimming any excess. Line the pastry with parchment paper, fill it with baking beans, and bake for 15 minutes. Remove the paper and beans, then bake for an additional 10-15 minutes until the crust is lightly golden. Set aside to cool.
- In a medium saucepan, melt 4oz of butter over low heat, then add 10oz of demerara sugar. Stir gently until fully dissolved, about 5 minutes. Gradually whisk in 6floz of milk and 3oz of plain flour, combining until smooth. Continue to cook over medium heat, stirring constantly until the mixture thickens, which should take around 5-7 minutes.
- Once the filling is thick and creamy, carefully pour it into the cooled pastry shell. Use a spatula to smooth the top, ensuring an even distribution. Let it sit at room temperature for about 10 minutes, then cover with plastic wrap and place in the refrigerator for at least 2 hours.
- To serve, you can garnish each slice of the tart with a dollop of whipped cream or a sprinkle of flaky sea salt. Cut into wedges and serve chilled.
Leave a Reply