
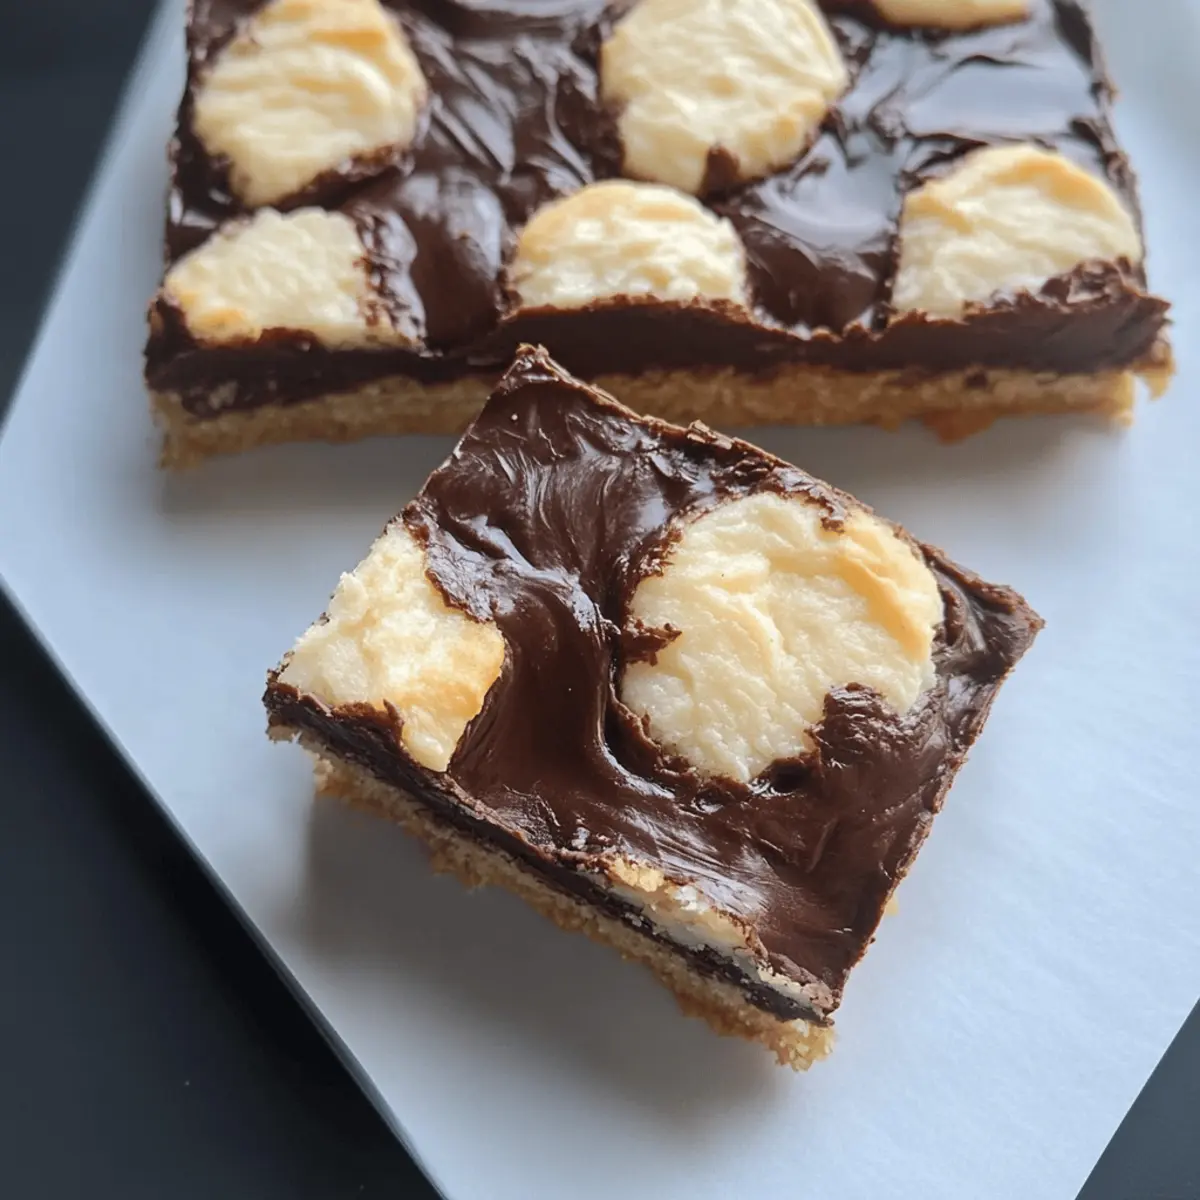
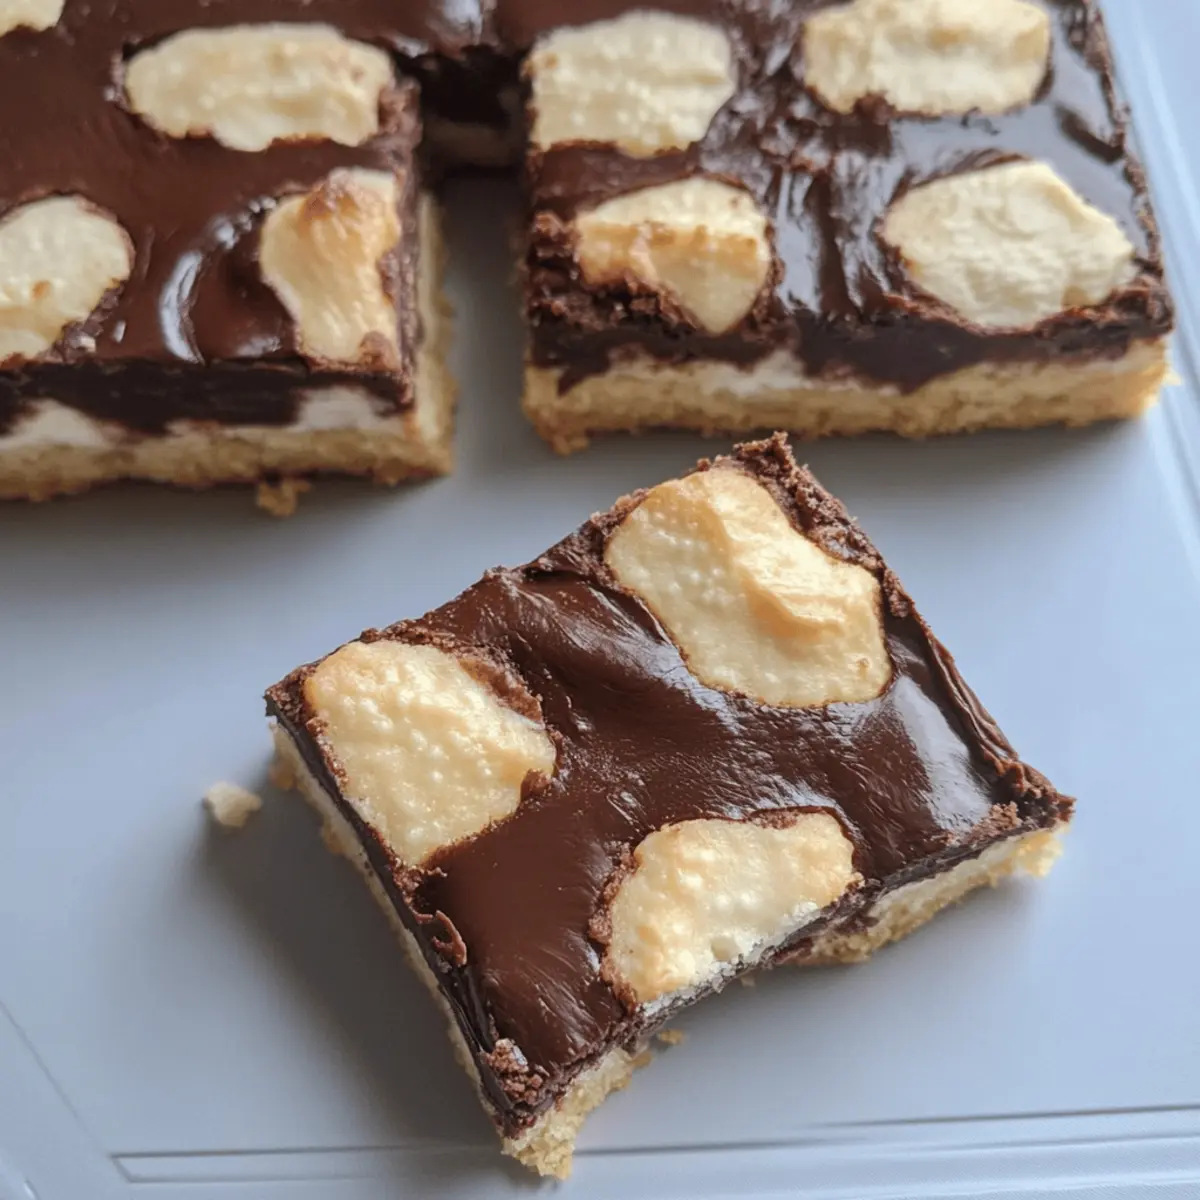
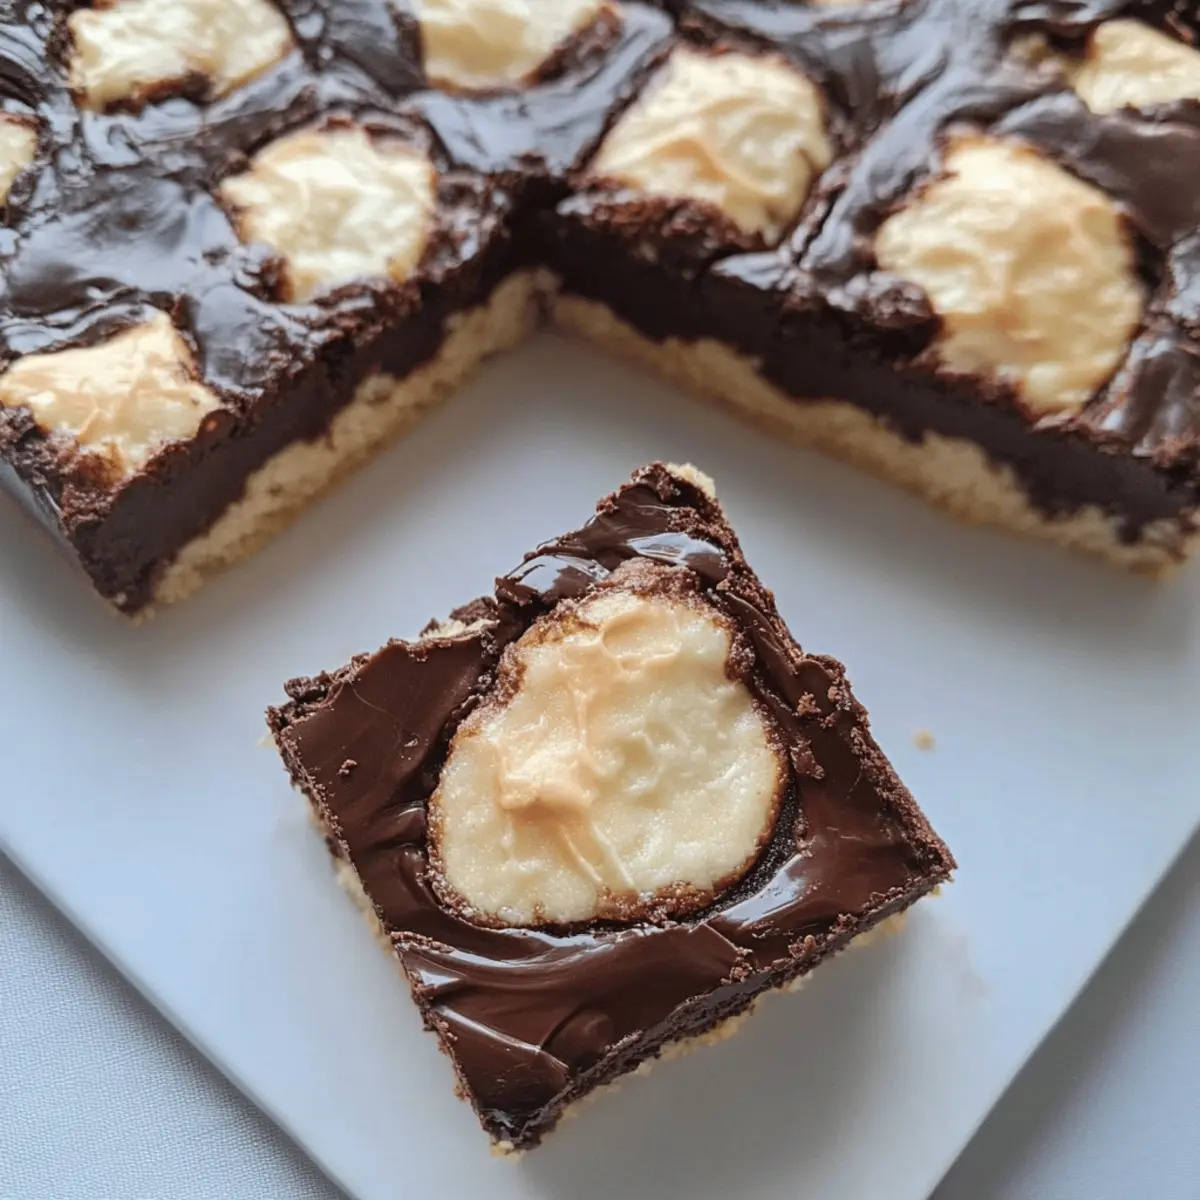
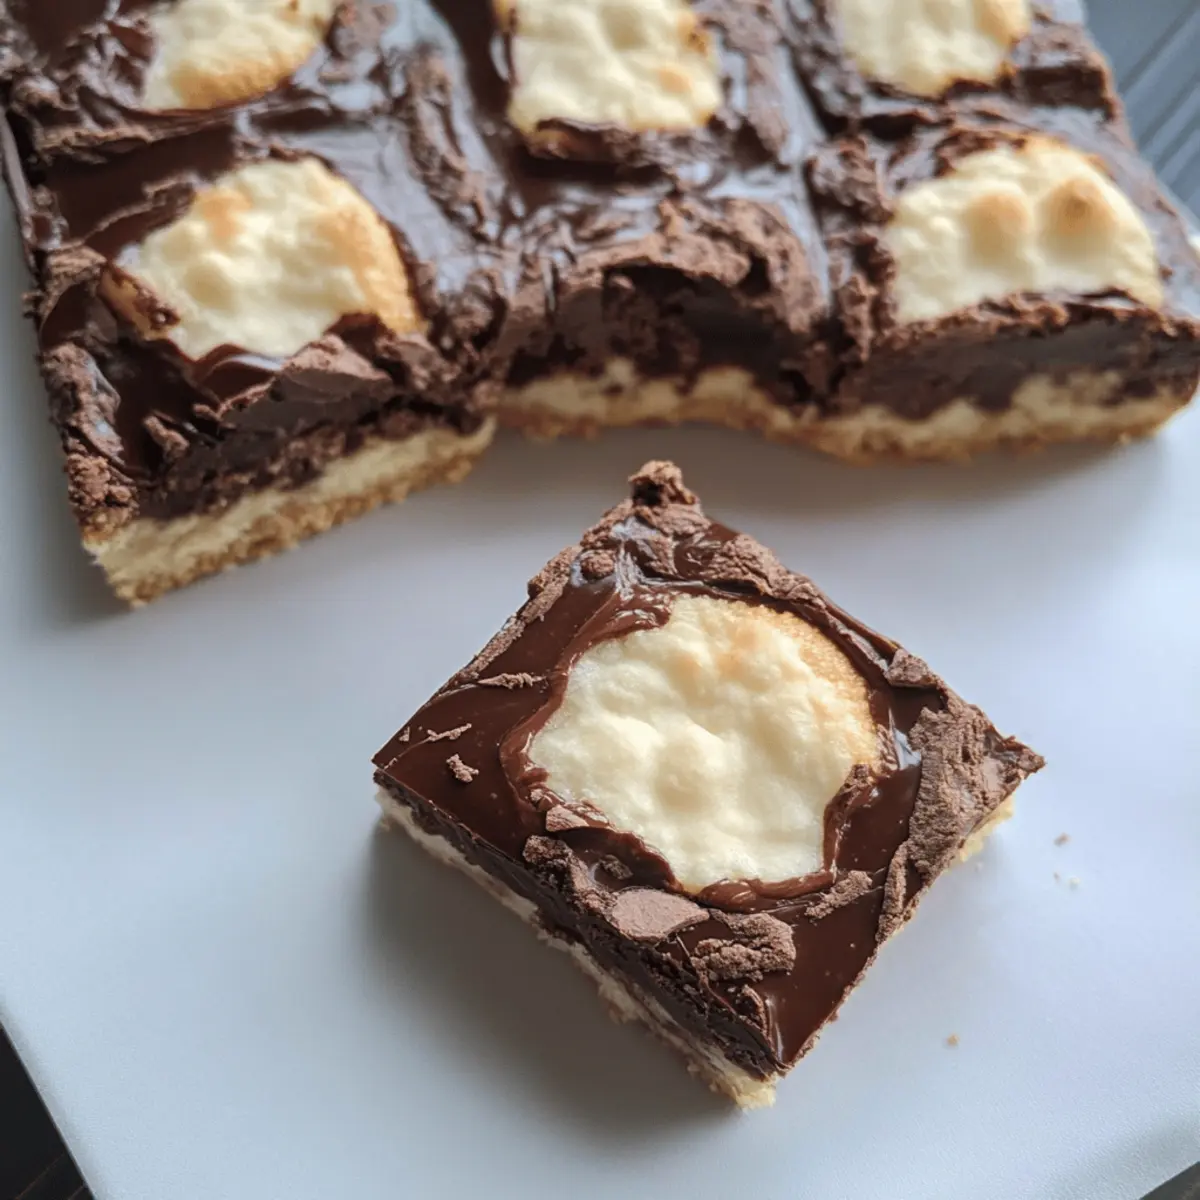
As the sun dipped below the horizon, I found myself craving something sweet that could satisfy my sweet tooth without a fuss. That’s when I whipped up these Can’t-Leave-Alone Bars, a delightful treat that combines a buttery shortbread-like base with a creamy chocolate filling. In just 35 minutes, you can have these quick snacks ready to indulge your family or friends. What I love most is how they effortlessly blend simplicity and decadence—perfect for any occasion, whether you’re hosting a gathering or just need a treat after a long day. With every bite, you’ll understand why they disappear faster than you can set them down! Curious about how to make this delicious dessert? Let’s dive in!
Why Are These Bars So Irresistible?
Simplicity: This recipe is a breeze, requiring minimal ingredients and only 35 minutes of your time. Perfect for busy individuals!
Decadent Taste: The rich chocolate filling and buttery base harmonize beautifully, ensuring every bite is a moment of sheer delight.
Versatile: Feel free to swap in chocolate cake mix or add nuts for a unique twist—these bars are your canvas for creativity!
Crowd-Pleasing: Whether at a birthday party or a cozy family night, these bars are bound to impress and disappear quickly. Pair them with a glass of cold milk for the ultimate indulgence!
For a delicious variation, check out these Melt Mouth Bars as well!
Make-Ahead Friendly: Store these in an airtight container, and they’ll stay fresh for up to a week—perfect for snacking throughout the week!
Can’t-Leave-Alone Bars Ingredients
For the Base
• 1 box white cake mix – This provides a soft and sweet structure; feel free to substitute with chocolate cake mix for extra richness.
• 2 large eggs – These will bind your ingredients together and add richness—mix thoroughly for a smooth batter.
• 1/3 cup oil – Adding moisture and tenderness; melted butter is an excellent substitute for more flavor.
For the Chocolate Filling
• 1 can (14 oz.) sweetened condensed milk – This creates the creamy filling; never substitute with evaporated milk as it lacks the sweetness needed.
• 1 cup semi-sweet chocolate chips – They enhance the chocolate flavor and add delightful texture, but dark chocolate chips can elevate the taste even further.
• 1/2 stick butter (cut small) – This ingredient adds richness and a glossy finish to the filling; margarine is a suitable alternative if desired.
Now that you have your ingredients ready, let’s bring these Can’t-Leave-Alone Bars to life with an easy-to-follow recipe that’s bound to become a family favorite!
Step‑by‑Step Instructions for Can’t-Leave-Alone Bars
Step 1: Preheat the Oven
Begin by preheating your oven to 350°F (175°C). Prepare your 13×9-inch baking pan by lining it with aluminum foil, allowing some overhang for easy removal later. Lightly spray the foil lining with cooking spray to ensure your Can’t-Leave-Alone Bars release effortlessly when baked.
Step 2: Make the Base
In a large mixing bowl, combine the box of white cake mix, two large eggs, and 1/3 cup of oil. Using an electric mixer, beat the ingredients until well blended and smooth, about 2-3 minutes. Once mixed, press approximately 2/3 of the batter firmly into the bottom of your prepared baking pan, creating an even layer that forms the base of the bars.
Step 3: Prepare the Chocolate Filling
In a microwave-safe bowl, combine the sweetened condensed milk, chocolate chips, and small pieces of butter. Microwave the mixture on high for 1 minute, then stir until everything is smooth and fully combined. This luscious filling will be poured over the crust, so ensure it’s melted and creamy before moving on to the next step.
Step 4: Assemble the Bars
Pour the chocolate filling over the pressed crust in the baking pan, ensuring it’s evenly spread and covers the entire base. With the reserved cake batter from earlier, use teaspoons to dot the top of the filling. These little dollops will create a beautiful contrast as the bars bake and set.
Step 5: Bake the Bars
Place the assembled pan in the preheated oven and bake for 20-25 minutes. Keep an eye on them; they should be set but still slightly soft in the middle when done. You’ll know they’re ready when the edges are golden and firm, and a toothpick inserted in the center comes out with a few moist crumbs.
Step 6: Cool and Cut
After baking, remove the pan from the oven and let the bars cool entirely in the pan. Use the foil overhang to lift the bars out once cooled. Transfer to a cutting board, slice into small squares, and enjoy your delightful Can’t-Leave-Alone Bars, perfect for any gathering or a sweet treat at home!
Make Ahead Options
These Can’t-Leave-Alone Bars are perfect for busy home cooks looking to save time during the week! You can prepare the base and store it in the refrigerator for up to 24 hours before baking, pressing it into the pan and covering it tightly with plastic wrap. For the filling, mix the chocolate mixture and refrigerate it in an airtight container for up to 3 days. When you’re ready to bake, simply pour the cold filling over the crust, dot with the reserved batter, and bake according to the instructions. This way, you’ll have delectable bars that taste just as delicious while streamlining your meal prep!
Can’t-Leave-Alone Bars Variations
Customize your Can’t-Leave-Alone Bars for a delightful twist that suits your taste buds!
- Chocolate Cake Mix: Substitute the white cake mix with chocolate for an intense chocolate flavor that deepens the dessert’s allure. Each bite will be a rich explosion of sweetness!
- Nutty Delights: Add chopped walnuts or pecans to the batter for a crunchy texture, bringing a delightful contrast to the gooey filling. This variation adds a rustic charm everyone will love.
- Fruity Surprise: Incorporate dried cherries or cranberries into the filling for a fruity burst of flavor that perfectly complements the chocolate. It’s a sweet surprise in every bite!
- Salted Caramel Drizzle: Drizzle some salted caramel sauce over the baked bars before cutting for a sweet and salty flavor profile that’ll have you swooning with each mouthful.
- Spice it Up: Add a pinch of cinnamon or espresso powder to the filling for a subtle warmth that elevates the chocolate experience to gourmet status.
- Peanut Butter Swirl: Mix in a few tablespoons of creamy peanut butter in the filling for a luscious layer of peanut butter chocolate goodness. It’s a classic flavor combo that’s hard to resist!
For more dessert inspiration, be sure to check out the Calories Frozen Banana for a refreshing treat or these mouthwatering Melt Mouth Bars that are guaranteed to be a hit!
Storage Tips for Can’t-Leave-Alone Bars
Room Temperature: Store your Can’t-Leave-Alone Bars in an airtight container at room temperature for up to a week to keep them fresh and chewy.
Fridge: If you prefer a firmer texture, keep the bars in the refrigerator for up to 2 weeks. Just make sure they’re well-wrapped to prevent drying out.
Freezer: For longer storage, freeze individual bars in an airtight container or wrapped in plastic wrap for up to 3 months. Thaw them at room temperature before enjoying.
Reheating: If you like them warm, pop a bar in the microwave for about 10-15 seconds to revive that gooey chocolate filling before serving!
Expert Tips for Can’t-Leave-Alone Bars
• Press Firmly: Make sure to press the base batter evenly into the pan; a solid foundation helps the bars hold together when baked.
• Microwave Wisely: When melting the chocolate filling, microwave in short bursts and stir frequently to avoid burning; a smooth mixture leads to a perfect filling!
• Cool Completely: Allow the bars to cool fully before cutting—this prevents them from crumbling and ensures clean, neat slices.
• Storage Secrets: Store your Can’t-Leave-Alone Bars in an airtight container at room temperature for up to a week to maintain freshness.
• Experiment with Toppings: Feel free to customize with nuts or dried fruit for added texture; it’s a delightful way to make each batch unique!
What to Serve with Can’t-Leave-Alone Bars
Indulging in these sweet bars opens the door to a world of delicious pairings that will elevate your dessert experience.
- Cold Milk: A glass of chilled milk complements the rich chocolate filling perfectly, making each bite even more satisfying.
- Vanilla Ice Cream: The creaminess of vanilla ice cream contrasts beautifully with the warm, gooey bars, creating a delightful temperature contrast.
- Fresh Berries: A side of strawberries or raspberries adds a refreshing zing, balancing the sweetness with a pop of tartness.
- Whipped Cream: Topping your Can’t-Leave-Alone Bars with fluffy whipped cream enhances the decadence and adds an airy texture to each bite.
- Coffee: A cup of brewed coffee pairs wonderfully, as the warm, bitter notes cut through the sweetness of the bars.
- Chocolate Sauce Drizzle: For the chocolate lovers out there, a drizzle of warm chocolate sauce on top adds an extra layer of indulgence!
- Nutty Side Salad: A simple arugula salad with toasted nuts and a light vinaigrette provides a fresh contrast to the rich sweetness of the bars.
- Peanut Butter Swirl: A small dollop of peanut butter offers a nutty flavor that pairs beautifully with chocolate, creating a satisfying combination.
- Coconut Flakes: Sweet, toasted coconut can be sprinkled on top of the bars for added texture and a delightful tropical flair, enhancing the overall experience.
- Sparkling Water: A refreshing glass of sparkling water with lemon or lime can cleanse your palate between bites, making for an enjoyable treat.
Can’t-Leave-Alone Bars Recipe FAQs
How do I choose the best cake mix for Can’t-Leave-Alone Bars?
Choosing the right cake mix depends on your flavor preference! For a classic taste, opt for a white cake mix, which provides a soft and sweet base. If you’re looking to indulge even more, using a chocolate cake mix can give your bars a richer, chocolatey kick. Just make sure to check for any dietary restrictions if you’re baking for others!
How should I store Can’t-Leave-Alone Bars?
You can store your Can’t-Leave-Alone Bars in an airtight container at room temperature for up to 1 week. This will keep them fresh and chewy. If you prefer a firmer texture, pop them in the refrigerator, where they’ll last for about 2 weeks. Just make sure they’re wrapped well to keep from drying out.
Can I freeze Can’t-Leave-Alone Bars?
Absolutely! For longer storage, you can freeze individual bars. Wrap each one in plastic wrap, then store them in an airtight container for up to 3 months. When you’re ready to enjoy, simply thaw them at room temperature or heat them in the microwave for 10-15 seconds to bring back their gooey goodness!
What should I do if my bars are too soft after baking?
If your Can’t-Leave-Alone Bars are too soft after baking, it’s likely they need more time in the oven. Keep an eye on them to achieve that perfectly set but slightly soft middle. Allow them to cool fully in the pan; they will firm up as they cool. If they still seem too sticky, consider baking them a bit longer next time, but be careful not to overbake!
Are Can’t-Leave-Alone Bars suitable for people with allergies?
While these bars are delightfully yummy, they’re made with ingredients that might not suit everyone. They contain eggs and can be high in sugar, so be mindful if anyone has egg allergies or is watching their sugar intake. To cater to dietary needs, consider using egg replacers for a vegan option or adjusting the filling components to accommodate allergies.
What toppings or mix-ins can I add to my Can’t-Leave-Alone Bars?
The sky’s the limit with mix-ins! I often add a handful of chopped nuts or dried fruits like cranberries or cherries for added texture and flavor. You could even sprinkle in some shredded coconut or crushed pretzels for a salty-sweet combination. Have fun experimenting to make these bars your own!
Irresistible Can't-Leave-Alone Bars You’ll Love to Make
Ingredients
Equipment
Method
- Preheat the oven to 350°F (175°C) and prepare your baking pan by lining it with aluminum foil.
- In a large mixing bowl, combine the white cake mix, large eggs, and oil. Beat until well blended and smooth, about 2-3 minutes.
- Press approximately 2/3 of the batter into the bottom of the baking pan.
- Combine sweetened condensed milk, chocolate chips, and butter in a microwave-safe bowl. Microwave for 1 minute, then stir until smooth.
- Pour the chocolate filling over the pressed crust and dot with the reserved cake batter.
- Bake for 20-25 minutes until the edges are golden. Let cool completely before cutting.
Leave a Reply