
Mornings often find us in a rush, navigating the chaotic dance between sleep and breakfast time. But nothing melts away that stress quite like the aroma of fresh-baked Jam Muffins wafting through the kitchen. These tender treats, with their surprise raspberry filling, come together in a breeze, making them an ideal choice for a wholesome breakfast or a delightful brunch centerpiece. The best part? You can easily customize them with your favorite jams, ensuring every batch feels like a new adventure. Plus, they are freezer-friendly, so you can savor the joy of homemade muffins anytime. Ready to elevate your morning routine? Let’s dive into the recipe!

Why are Jam Muffins a Must-Bake?
Sweet Surprise: Each bite reveals a delicious jam center that transforms a simple muffin into a delightful treat.
Quick & Easy: With straightforward steps, these muffins are great for both novice bakers and seasoned pros.
Versatile Options: Mix it up with different jams like blueberry or strawberry to suit your taste.
Freezer-Friendly: Bake a batch and freeze for quick breakfasts throughout the week—just reheat and enjoy!
Crowd Pleaser: Perfect for lazy Sunday brunches or even as an afternoon snack, these Jam Muffins will surely impress family and friends. For a twist, try adding spices or swapping in a gluten-free flour blend!
Jam Muffin Ingredients
For the Muffin Batter
- Flour – Provides structure; use all-purpose flour or substitute with a gluten-free blend for gluten-free jam muffins.
- Brown Sugar – Adds moisture and a caramel hint; can substitute with coconut sugar for a healthier option.
- Granulated Sugar – Sweetens the muffins; adjust the amount for your desired sweetness level.
- Baking Powder – Acts as a leavening agent; ensure it’s fresh for optimal rise in your muffins.
- Salt – Enhances flavor; a pinch is essential to balance the sweetness of the jam.
- Egg – Binds ingredients and adds richness; replace with a flax egg for a vegan version.
- Milk – Adds moisture; any milk works, including dairy-free options like almond or oat milk.
- Butter (melted) – Contributes moisture and flavor; can be replaced with melted coconut oil for a dairy-free treat.
- Vanilla Extract – Adds depth to the flavor; almond extract is a great substitute if desired.
- Raspberry Jam – The sweet surprise at the center; feel free to use any jam or jelly flavor you love.
Optional Topping
- Powdered Sugar – Dust lightly on top for an elegant finish and extra sweetness.
These Jam Muffins are not just a breakfast option; they bring a burst of flavor that warms the heart and satisfies the spirit. Enjoy your baking adventure!
Step‑by‑Step Instructions for Jam Filled Muffins
Step 1: Preheat and Prepare
Begin by preheating your oven to 400°F (200°C). While it warms up, take a muffin tin and either grease each cup with butter or line them with paper liners. This will help ensure your Jam Muffins come out easily and maintain their shape. Set the prepared tin aside to get ready for the batter.
Step 2: Mix Dry Ingredients
In a large mixing bowl, combine the flour, brown sugar, granulated sugar, baking powder, and salt. Whisk these ingredients together until they are evenly blended. This step is crucial as it ensures that your Jam Muffins rise beautifully and have a uniform sweetness. Set this bowl aside while you prepare the wet ingredients.
Step 3: Combine Wet Ingredients
In a separate bowl, crack an egg and whisk it together with the milk, melted butter, and vanilla extract until the mixture is smooth and well combined. The warmth of the melted butter should blend easily with the other ingredients, creating a rich, creamy base that will enhance the flavors of your Jam Muffins.
Step 4: Combine Wet and Dry Ingredients
Now, pour the wet mixture into the bowl of dry ingredients. Gently stir everything together until just moistened—be careful not to overmix, as this can make your muffins dense. You’ll want to see a few lumps remaining in the batter; this is a good sign that your muffins will be tender and fluffy.
Step 5: Fill Muffin Cups
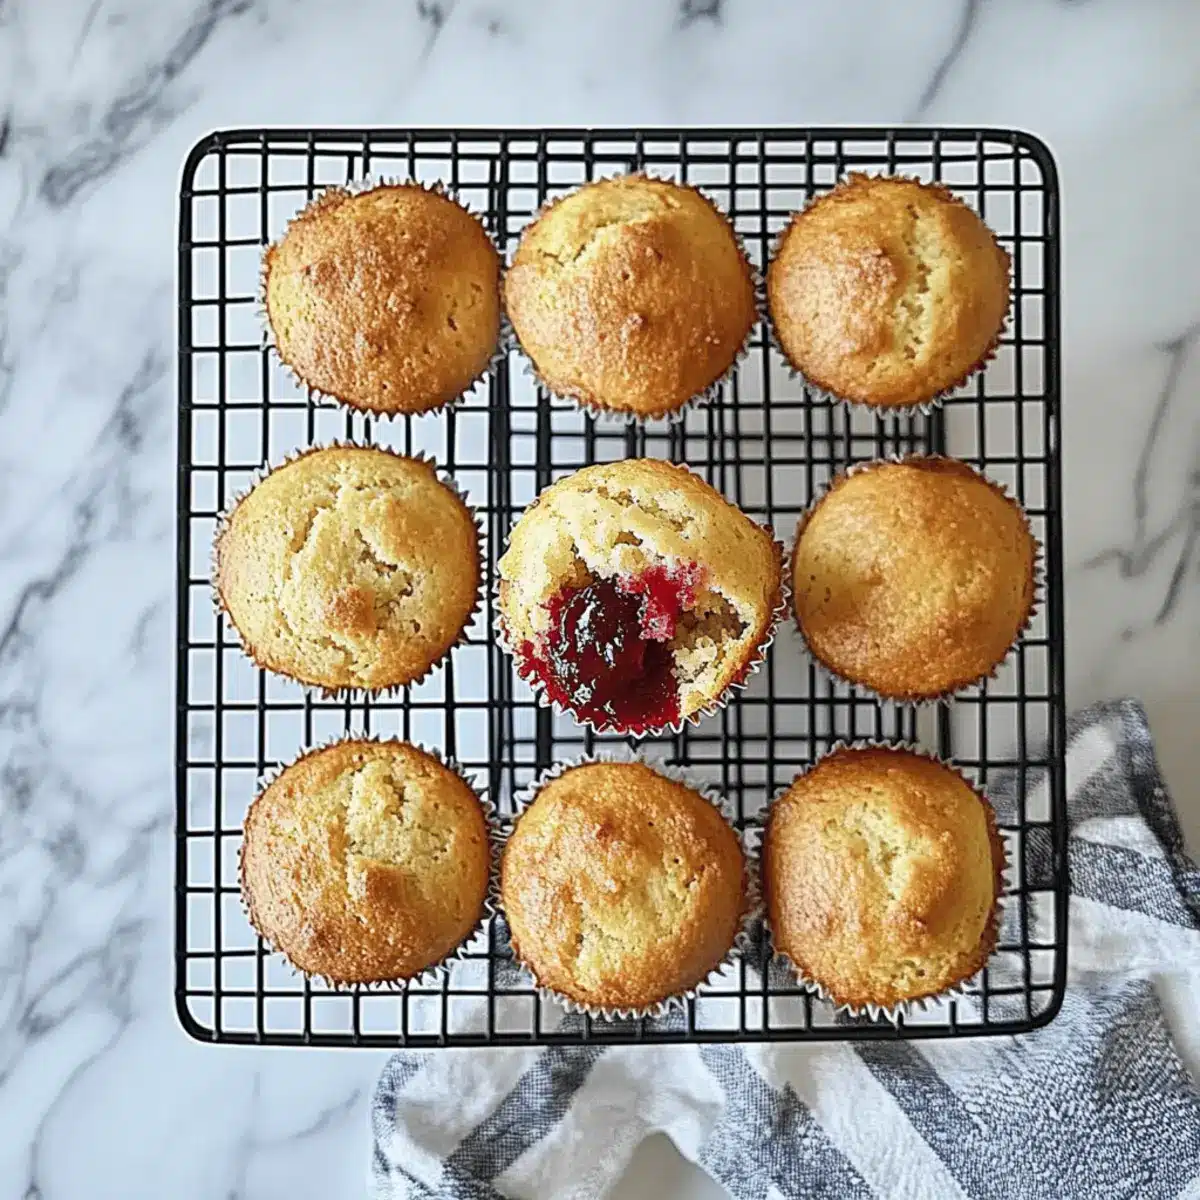
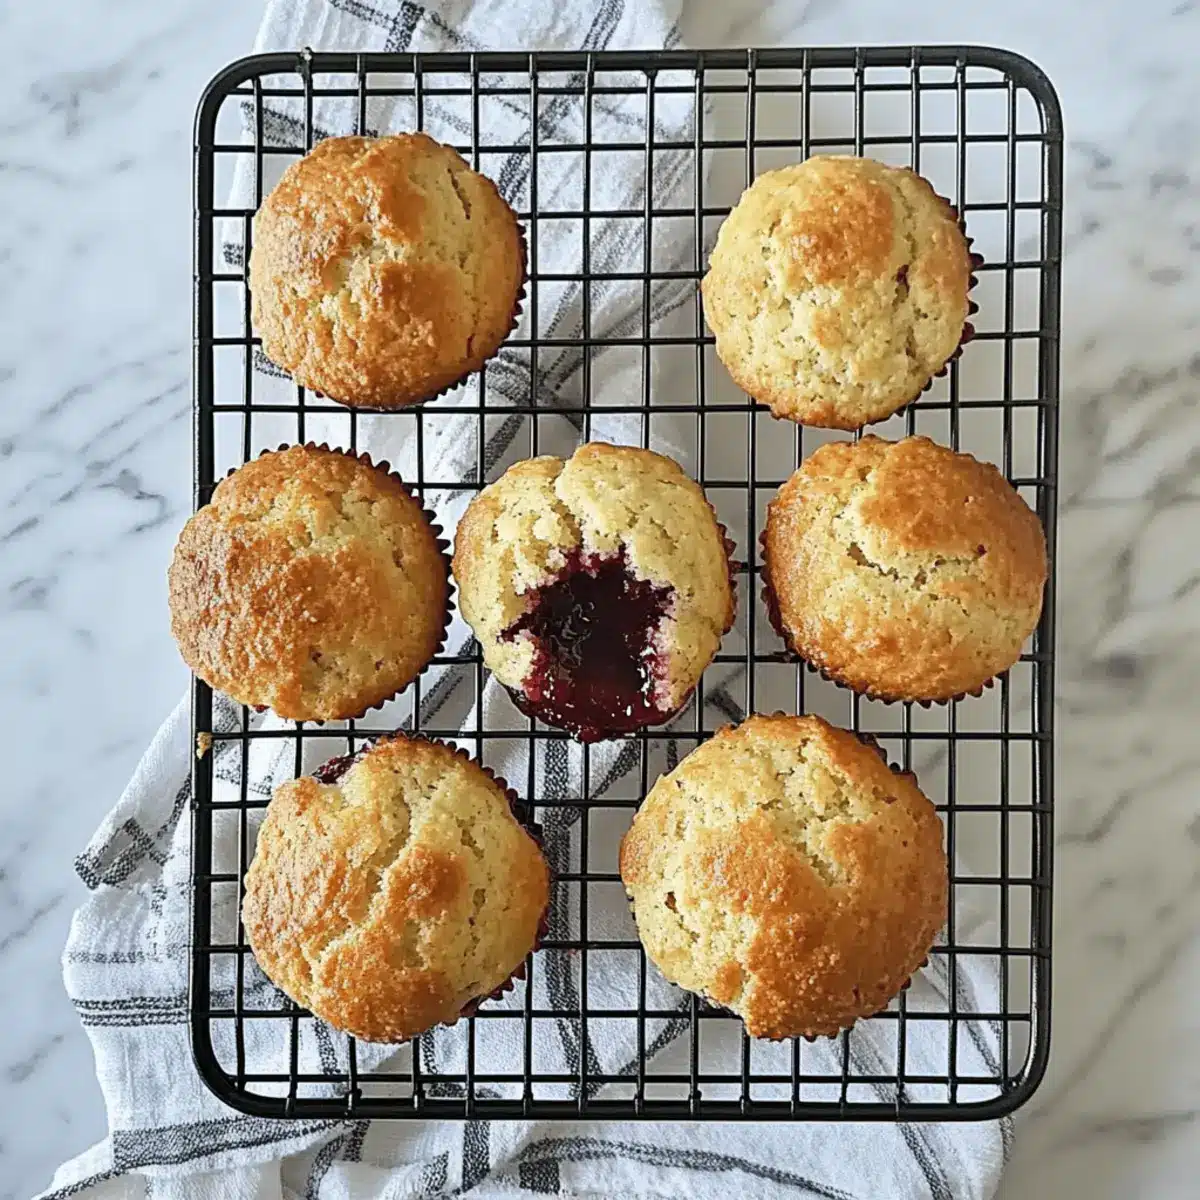
Using a spoon, fill each muffin cup about halfway with the batter. Then, add approximately 1 teaspoon of raspberry jam into the center of each cup. Finally, top with the remaining batter, filling each cup until about two-thirds full. This layering is key to ensuring each bite of your muffins is a delightful surprise!
Step 6: Bake for Perfection
Place the muffin tin in your preheated oven and bake for about 20 minutes. You’ll know they’re done when the tops are lightly golden and a toothpick inserted into the center comes out clean. The tantalizing aroma of your Jam Filled Muffins will fill the kitchen—get ready for a treat!
Step 7: Cool and Enjoy
After baking, allow the muffins to cool in the pan for 5 minutes. This step helps them set properly. Once slightly cooled, gently transfer them to a wire rack to cool completely. Enjoy these delightful Jam Muffins warm, or store them for a sweet morning treat later!
What to Serve with Tender Jam Filled Muffins
Mornings are not complete without the perfect accompaniments to balance those sweet, tender bites.
- Fresh Fruit Salad: A refreshing mix of seasonal fruits brightens up the plate and contrasts beautifully with the rich muffins.
- Greek Yogurt Parfait: The creaminess of yogurt layered with granola and berries adds a delightful crunch and tangy flavor.
- Coffee or Tea: A warm cup of your favorite brew enhances the comforting experience of enjoying freshly baked Jam Muffins.
- Creamy Butter: Spreading a touch of butter on warm muffins elevates their flavor and adds a decadent richness.
- Maple Syrup Drizzle: For those who enjoy an extra touch of sweetness, a light drizzle of maple syrup adds delightful flavor.
- Savory Quiche: Pairing with a quiche offers a savory balance, making this a well-rounded, brunch-worthy meal.
- Chocolate Spread: For a sweet twist, a scoop of chocolate spread creates a decadent treat that is too good to resist.
Elevate your breakfast or brunch gathering by mixing and matching these delicious pairings to savor every delightful bite!
Expert Tips for Jam Muffins
- Don’t Overmix: Mixing too much can lead to dense muffins. Stir until just combined for that light and fluffy texture.
- Use Fresh Baking Powder: An expired baking powder can result in flat muffins. Always check the date for optimal rising!
- Customize Flavors: Experiment with different jam fillings like blueberry or apricot to keep things exciting. Each jam muffins batch can surprise your taste buds!
- Perfect Cooling Time: Let muffins cool for a few minutes in the pan before transferring them to a wire rack, ensuring they don’t stick.
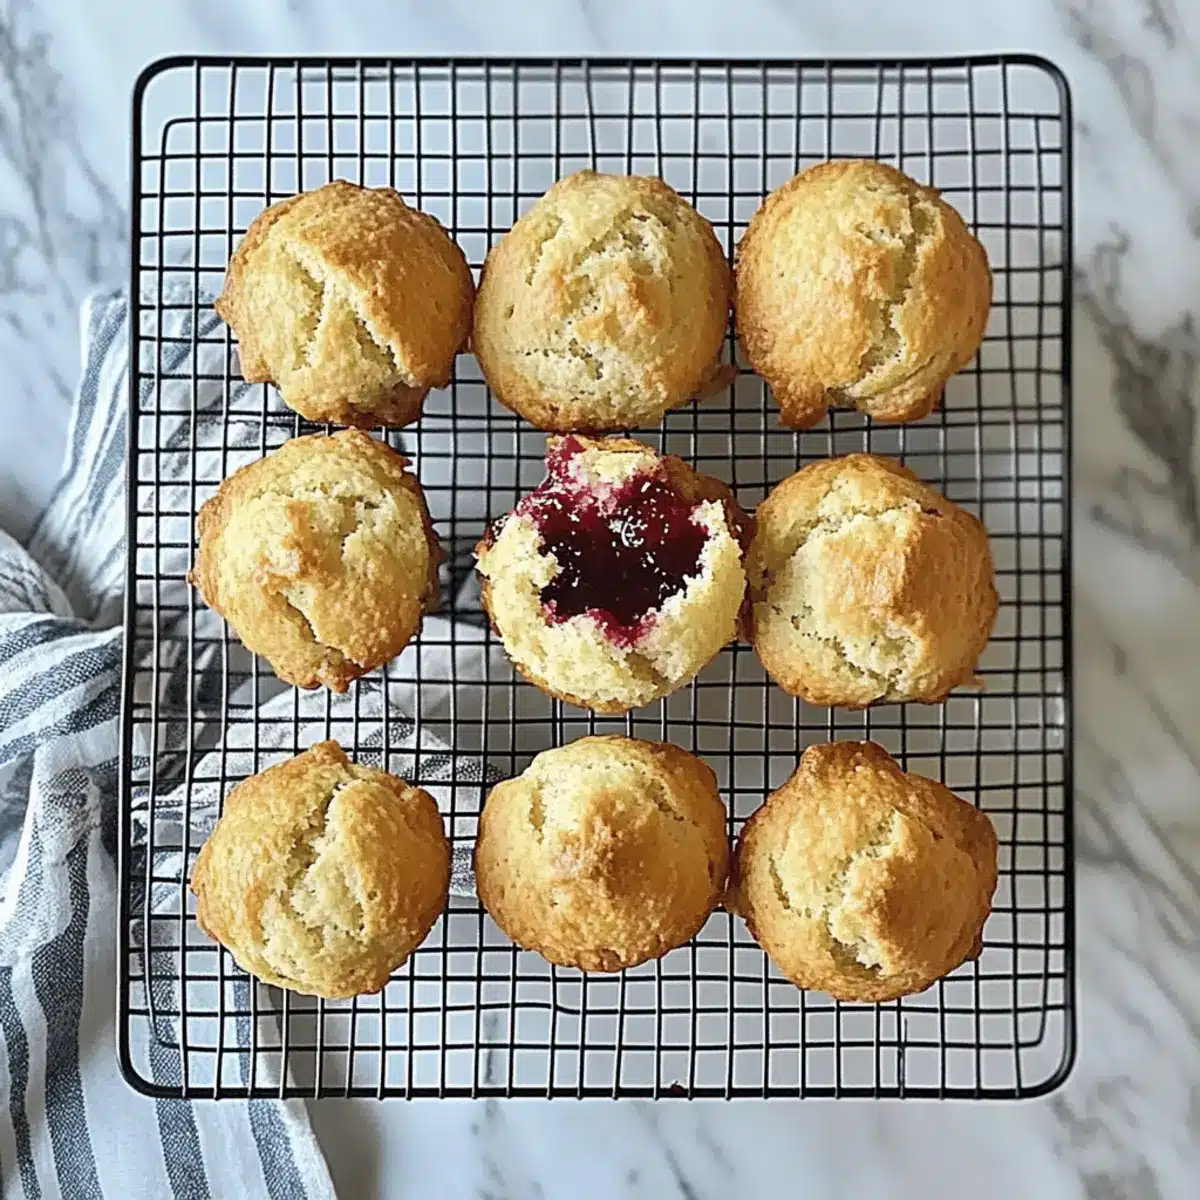
- Mini Muffin Option: Want smaller bites? Bake mini muffins and reduce the baking time to about 9-11 minutes for delightful poppable treats!
Jam Muffins: Fun Variations & Substitutions
Feel free to explore some delicious twists on this recipe, making each batch uniquely yours!
- Flavor Boosts: Add a teaspoon of cinnamon or nutmeg to the batter for a warm, spicy kick.
- Fruit Swap: Try filling the muffins with strawberry or blueberry jam instead of raspberry for a different fruity surprise.
- Gluten-Free: Substitute all-purpose flour with a gluten-free blend to create gluten-free jam muffins that everyone can enjoy.
- Dairy-Free: Replace milk with almond milk and butter with coconut oil for a completely dairy-free option.
- Oat Flour: For added texture, swap half of the all-purpose flour with oat flour to give a nutty flavor.
- Zesty Twist: Mix in the zest of an orange or lemon to the batter for an uplifting citrus note that brightens the flavor profile.
- Mini Muffins: Bake them as mini muffins by reducing the baking time to 9-11 minutes, making perfect bite-sized treats.
- Fresh Fruits: Fold in fresh berries like chopped strawberries or blueberries into the batter for a burst of juicy freshness.
Experimenting with these variations can elevate your baking game! If you’re looking for more muffin inspiration, check out these Flourless Pumpkin Muffins for a delightful seasonal twist or try out the ever-popular apple cinnamon muffins for extra cozy vibes. Enjoy your kitchen creativity!
How to Store and Freeze Jam Muffins
Room Temperature: Store muffins in an airtight container at room temperature for up to 2-3 days to maintain freshness.
Fridge: If you prefer longer storage, keep them in the refrigerator for up to a week, ensuring they’re in a sealed container to prevent drying out.
Freezer: For extended storage, freeze muffins for up to 3 months. After cooling, wrap each muffin individually in plastic wrap and place them in an airtight freezer bag.
Reheating: To enjoy, simply reheat from frozen for about 15-20 minutes in a preheated oven at 350°F (175°C) or microwave for 30-40 seconds until warm.
Make Ahead Options
These Jam Muffins are perfect for meal prep enthusiasts! You can prepare the batter up to 24 hours in advance by combining the dry and wet ingredients separately and keeping them in the refrigerator. To do this, you can store the dry ingredients in one bowl and the wet ingredients in another, ensuring they are tightly covered to maintain freshness. When ready to bake, simply mix them together, fill your muffin cups, and drop in the raspberry jam. If you prefer to bake ahead, these muffins can be stored at room temperature for up to 3 days or frozen for up to 3 months; just remember to let them cool completely before sealing them in an airtight container. Reheat in the oven for a warm, fresh experience that’s just as delicious as when they first came out of the oven!
Jam Muffins Recipe FAQs
What type of flour should I use for Jam Muffins?
You can use all-purpose flour for the best results. If you need a gluten-free option, a quality gluten-free flour blend will work nicely in place of regular flour. The important thing is to ensure that any gluten-free blend you choose contains xanthan gum for proper structure.
How should I store my Jam Muffins?
Store your muffins in an airtight container at room temperature for up to 2-3 days. This keeps the muffins fresh and delightful. If you want to store them longer, refrigerate them in a sealed container for up to a week. Just be sure to let them cool completely before sealing to avoid moisture buildup.
Can I freeze Jam Muffins? If so, how?
Absolutely! To freeze your Jam Muffins, first allow them to cool completely. Then, wrap each muffin individually in plastic wrap and place them in an airtight freezer bag. They can be frozen for up to 3 months. When you’re ready to enjoy, simply reheat them in a preheated oven at 350°F (175°C) for about 15-20 minutes or microwave each muffin for 30-40 seconds until warmed through.
What should I do if my muffins don’t rise?
If your muffins didn’t rise, it’s often due to the baking powder being expired. Always check the expiration date and use fresh baking powder to ensure a good rise. Additionally, make sure not to overmix the batter, as this can lead to dense muffins. A few lumps in the batter are perfectly fine!
Can I use different flavors of jam in my muffins?
Yes, you can! Feel free to experiment with any jam or jelly flavor you like. Raspberry, strawberry, blueberry, or even a tart apricot jam can add an exciting twist to your muffins. Each flavor brings a new surprise that makes baking these muffins such a joy!
Are Jam Muffins safe for pets?
Jam Muffins are best kept away from pets, especially if they contain ingredients like chocolate or xylitol, which are toxic to dogs. Additionally, the sugars and other ingredients used for human consumption may not suit a pet’s diet. It’s always safest to share only pet-safe snacks with your furry friends.
Melt-in-Your-Mouth Jam Muffins for a Sweet Morning Treat
Ingredients
Equipment
Method
- Preheat your oven to 400°F (200°C) and prepare your muffin tin with butter or paper liners.
- Mix flour, brown sugar, granulated sugar, baking powder, and salt in a large bowl.
- In another bowl, whisk the egg, milk, melted butter, and vanilla extract together.
- Combine the wet ingredients with the dry ingredients and stir until just moistened.
- Fill each muffin cup halfway, add raspberry jam, then top with remaining batter.
- Bake for about 20 minutes until tops are golden and a toothpick comes out clean.
- Cool in the pan for 5 minutes, then transfer to a wire rack to cool completely.
Leave a Reply