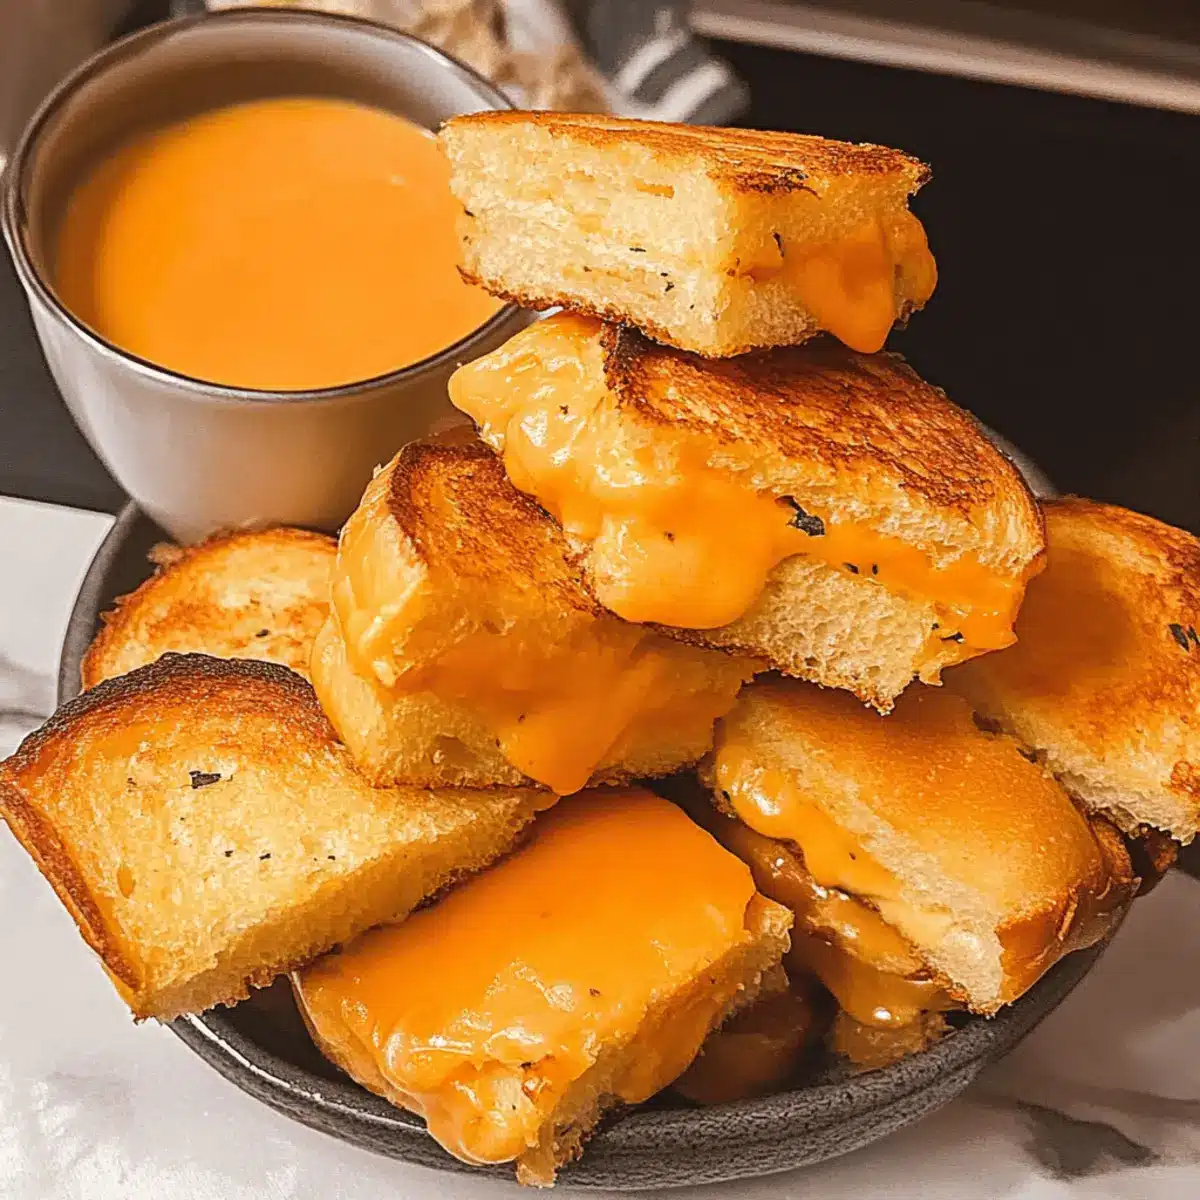
As I sat down on a rainy afternoon, the comforting aroma of melting cheese wafted through my kitchen, wrapping me in a warm embrace reminiscent of childhood lunches. That’s when I knew it was the perfect time to whip up some Hawaiian Roll Mini Grilled Cheese Sandwiches. This delightful twist on a classic favorite not only combines the unique sweetness of Hawaiian Rolls with rich, gooey cheese but also ensures that it’s a family-friendly option everyone will adore. With minimal prep time and a guarantee to satisfy even the pickiest eaters, these delightful bites are perfect for casual weeknight meals or gatherings with friends. So, why settle for the ordinary when you can elevate your grilled cheese game? Join me in creating a nostalgic experience, and let’s dive into this mouthwatering recipe together!

Why Choose Hawaiian Roll Grilled Cheese?
Unique Flavor Combination: Experience the delightful blend of sweet Hawaiian Rolls and rich, melty cheese that will tantalize your taste buds.
Family-Friendly Appeal: This recipe promises a hit with all ages, making it a perfect choice for weeknight dinners or playdates.
Quick Prep Time: With just a few ingredients and simple steps, you can whip these up in under 30 minutes – perfect for busy evenings!
Crowd-Pleasing Snack: Whether you’re serving it at a game day gathering or a cozy family dinner, these mini sandwiches are sure to impress.
Ultimate Comfort Food: Who could resist a crispy exterior with that gooey, cheesy center? Pair it with a warm bowl of tomato soup for a complete nostalgia trip! For extra fun, check out my Ham Cheese Butter Swim Biscuits for another easy, crowd-pleasing recipe!
Hawaiian Roll Grilled Cheese Ingredients
For the Garlic Herb Butter
• Softened Butter – Adds richness and helps achieve a golden crust. Substitution: Can use olive oil for a dairy-free option.
• Oregano – Provides an aromatic herbal flavor that complements the dish. Substitution: Italian seasoning can be used as an alternative.
• Garlic Powder – Adds a mild, savory kick to the butter mixture. Substitution: Fresh minced garlic can be substituted for a more robust flavor.
• Parsley – Adds a hint of freshness and color to the butter. Substitution: Any dried herbs like basil or thyme would work well.
For the Sandwiches
• King’s Hawaiian Original Sweet Rolls – The base of the sandwich, their sweetness enhances flavor and texture. Substitution: Other soft sweet dinner rolls can be used but may not provide the same flavor profile.
• Cheese – Essential for a classic grilled cheese texture and flavor. Note: Cheddar or American cheese is often preferred for melting properties.
Step‑by‑Step Instructions for Hawaiian Roll Grilled Cheese
Step 1: Preheat the Oven
Begin by preheating your oven to 350°F (175°C). This step is crucial for achieving that perfect golden crust on your Hawaiian Roll Grilled Cheese. While the oven warms up, gather your ingredients and prepare a baking sheet lined with parchment paper or lightly greased for easy cleanup.
Step 2: Make the Garlic Herb Butter
In a mixing bowl, combine softened butter with oregano, garlic powder, and parsley. Use a spatula to blend the ingredients until well incorporated, creating a creamy garlic herb butter. This mixture will enhance the flavor of your sandwiches and help them achieve a luscious, crispy exterior as they bake.
Step 3: Prepare the Rolls
Next, carefully slice the King’s Hawaiian Rolls into thirds to create mini sandwich pieces. Make sure each piece is separated but retains its shape. Spread a generous layer of the garlic herb butter mixture evenly onto each slice, ensuring every bite will be flavorful. The sweetness of the rolls combined with the savory butter is key to the delicious Hawaiian Roll Grilled Cheese.
Step 4: Assemble the Sandwiches
Now it’s time to assemble your mini grilled cheese sandwiches! Place half of the buttered roll portions on a baking sheet, followed by a couple of slices of cheese on top. Then, cap each with the remaining buttered roll pieces to create a delicious sandwich stack. Ensure they are placed close together on the baking sheet for optimal warmth during baking.
Step 5: Bake to Perfection
Pop the baking sheet into the preheated oven and let the Hawaiian Roll Grilled Cheese bake for about 20-25 minutes. You’re looking for a beautiful golden-brown color on the tops, so keep an eye on them. Halfway through baking, carefully flip the sandwiches to ensure they crisp up nicely on both sides.
Step 6: Serve Warm
Once baked to perfection, remove the mini grilled cheese sandwiches from the oven. Let them sit for a minute to cool slightly before serving. These delightful bites are best enjoyed warm, and you can pair them with a comforting bowl of tomato soup for dipping, enhancing the nostalgia of this beloved comfort food.

Make Ahead Options
If you’re looking to streamline your mealtime, these Hawaiian Roll Mini Grilled Cheese sandwiches are perfect for meal prep! You can prepare the garlic herb butter up to 24 hours in advance and refrigerate it in an airtight container. Additionally, slice the King’s Hawaiian Rolls and spread the butter mixture on each slice ahead of time, storing them tightly wrapped in the fridge for up to 3 days. When you’re ready to serve, simply assemble the sandwiches and bake them at 350°F (175°C) for about 20-25 minutes until golden brown. This way, you can enjoy the same delightful flavors with minimal effort, making weeknight dinners a breeze!
How to Store and Freeze Hawaiian Roll Grilled Cheese
Fridge: Store leftover Hawaiian Roll Grilled Cheese in an airtight container for up to 3-4 days to maintain freshness.
Freezer: For longer storage, wrap individual sandwiches in plastic wrap and place them in a freezer-safe bag. They can be frozen for up to 2 months.
Reheating: To enjoy your frozen sandwiches, simply thaw them in the fridge overnight, then reheat in the oven at 350°F (175°C) for 10-15 minutes for optimal crispiness.
Serving Tip: Enjoy them with a warm bowl of tomato soup for an indulgent comfort food experience!
What to Serve with Hawaiian Roll Mini Grilled Cheese?
Elevate your mini grilled cheese experience with delightful sides that complement their sweetness and gooeyness.
-
Tomato Soup: A classic pairing that adds warmth and richness, making each bite of grilled cheese even more comforting. The creamy texture blends perfectly with the crispy sandwiches.
-
Crispy Pickles: Their tangy crunch cuts through the richness of the cheese, offering a refreshing contrast that brightens every bite. These are a must for any sandwich platter!
-
Garden Salad: A light and refreshing salad adds a crisp, fresh element. Toss in some cherry tomatoes, cucumbers, and a zesty vinaigrette for a delightful balance.
-
Potato Chips: The crunch of salty potato chips complements the melt-in-your-mouth texture of the sandwiches. Choose flavored options for an exciting twist!
-
Sweet Potato Fries: These offer a slightly sweet counterpoint to the Hawaiian Roll Mini Grilled Cheese. Baked or fried, they add a satisfying crunch that pairs beautifully.
-
Sparkling Lemonade: A bubbly, citrusy drink that refreshes the palate and enhances the enjoyment of your meal. It’s delightful, especially on a cozy afternoon!
Tips for the Best Hawaiian Roll Grilled Cheese
Crispy Finish: Make sure to spread the garlic herb butter generously on every slice—this creates that irresistible golden crust!
Cheese Variety: Experiment with different cheeses like pepper jack for a spicy kick or mozzarella for a stretchy melt; don’t shy away from two cheese combinations for extra flavor.
Avoid Sogginess: Serve the mini sandwiches immediately after baking to keep them crispy; leftovers can be reheated but may lose some texture.
Oven Timing: Keep an eye on them as they bake. Start checking for doneness around 20 minutes to avoid burning and achieve that perfect golden brown.
Kids’ Approval: Get the kids involved by letting them help assemble the Hawaiian Roll Grilled Cheese—they’ll love creating their own sandwiches!
Hawaiian Roll Grilled Cheese Variations
Feel free to put your own spin on this delightful recipe and discover new flavor combinations!
-
Dairy-Free: Use dairy-free cheese and olive oil instead of butter for a lactose-free option.
This allows everyone to enjoy the deliciousness without missing out on the flavors! -
Spicy Twist: Incorporate pepper jack cheese and add jalapeño slices for a kick.
The spiciness adds an exciting layer to the classic comfort food. -
Pesto Boost: Spread pesto sauce on the rolls along with the garlic herb butter for a herbaceous twist.
This not only elevates the flavor but also adds vibrant color to your sandwiches! -
Bacon Lovers: Crispy bacon can take these sandwiches to a whole new level!
Layer it in between the cheese for a savory addition that pairs perfectly with the sweetness of the rolls. -
Tomato & Basil: Add fresh tomato slices and basil leaves for a Caprese-inspired grilled cheese.
The fresh ingredients brighten the flavor and create a lovely contrast with the gooey cheese. -
Sweet & Savory: Spread a layer of honey or fig jam inside before topping with cheese.
The sweetness beautifully complements the savory elements of the sandwich. -
Herb Variations: Swap parsley for fresh cilantro or dill in the garlic butter for an unexpected flavor profile.
These herbs bring a unique freshness that can completely transform each bite.
For yet another scrumptious adventure in cooking, you might enjoy trying my delicious Crockpot Hawaiian BBQ Chicken that can be a delight on game days!

Hawaiian Roll Grilled Cheese Recipe FAQs
What type of cheese is best for Hawaiian Roll Grilled Cheese?
Absolutely! For the ultimate Hawaiian Roll Grilled Cheese experience, I recommend using cheddar or American cheese for their exceptional melting properties. However, for a twist, you can also try mozzarella for a stringy texture, or pepper jack if you’re in the mood for something spicy!
How do I choose ripe ingredients for this recipe?
When selecting King’s Hawaiian Rolls, look for ones without any dark spots or signs of mold. They should feel soft and bouncy to the touch. For the herbs, fresh parsley with vibrant green leaves is ideal, while oregano should be aromatic and not stale. Freshness equals flavor!
How should I store leftover Hawaiian Roll Grilled Cheese?
Storing is simple! Place any leftovers in an airtight container in the refrigerator. They will stay fresh for up to 3-4 days. Just remember, for the best taste, enjoy them warm!
Can I freeze Hawaiian Roll Grilled Cheese for later?
Yes, you can! To freeze, after they have cooled completely, wrap each sandwich tightly in plastic wrap and store them in a freezer-safe bag. They will last up to 2 months. When you’re ready to enjoy them, simply thaw in the fridge overnight and reheat in the oven at 350°F (175°C) for about 10-15 minutes until crispy.
What if my grilled cheese sandwiches aren’t getting golden brown?
If you find your Hawaiian Roll Grilled Cheese is not achieving that perfect golden brown, check your oven’s temperature. It could be that the oven isn’t heating evenly. Additionally, ensure that each sandwich has an even layer of butter applied, as this helps promote browning!
Are there any dietary considerations for this recipe?
Very important! If you or anyone you’re serving has dietary restrictions, you can substitute softened butter with olive oil for a dairy-free option. Also, make sure to check cheese labels for potential allergens if you’re catering to food sensitivities. Enjoy making it match your family’s dietary needs!

Hawaiian Roll Grilled Cheese: A Sweet Twist on Comfort Food
Ingredients
Equipment
Method
- Preheat your oven to 350°F (175°C) and prepare a baking sheet lined with parchment paper or lightly greased.
- In a mixing bowl, combine softened butter with oregano, garlic powder, and parsley to create a creamy garlic herb butter.
- Slice the King’s Hawaiian Rolls into thirds and spread a layer of garlic herb butter on each slice.
- Assemble your mini grilled cheese sandwiches by placing half of the buttered roll portions on a baking sheet, adding cheese on top, and capping with the remaining buttered roll portions.
- Bake the sandwiches in the preheated oven for 20-25 minutes, flipping them halfway through to ensure even crispness.
- Remove the sandwiches from the oven and let them cool slightly before serving warm with tomato soup.

Leave a Reply