Table of Contents
Introduction
Roti, a staple flatbread in many South Asian cuisines, is loved for its simplicity and versatility. Whether you’re a beginner or an experienced cook, mastering the art of making perfect roti is a valuable skill. In this blog post, we’ll guide you through the process of creating soft, fluffy, and delicious roti recipe at home.
How to Make Roti Recipe
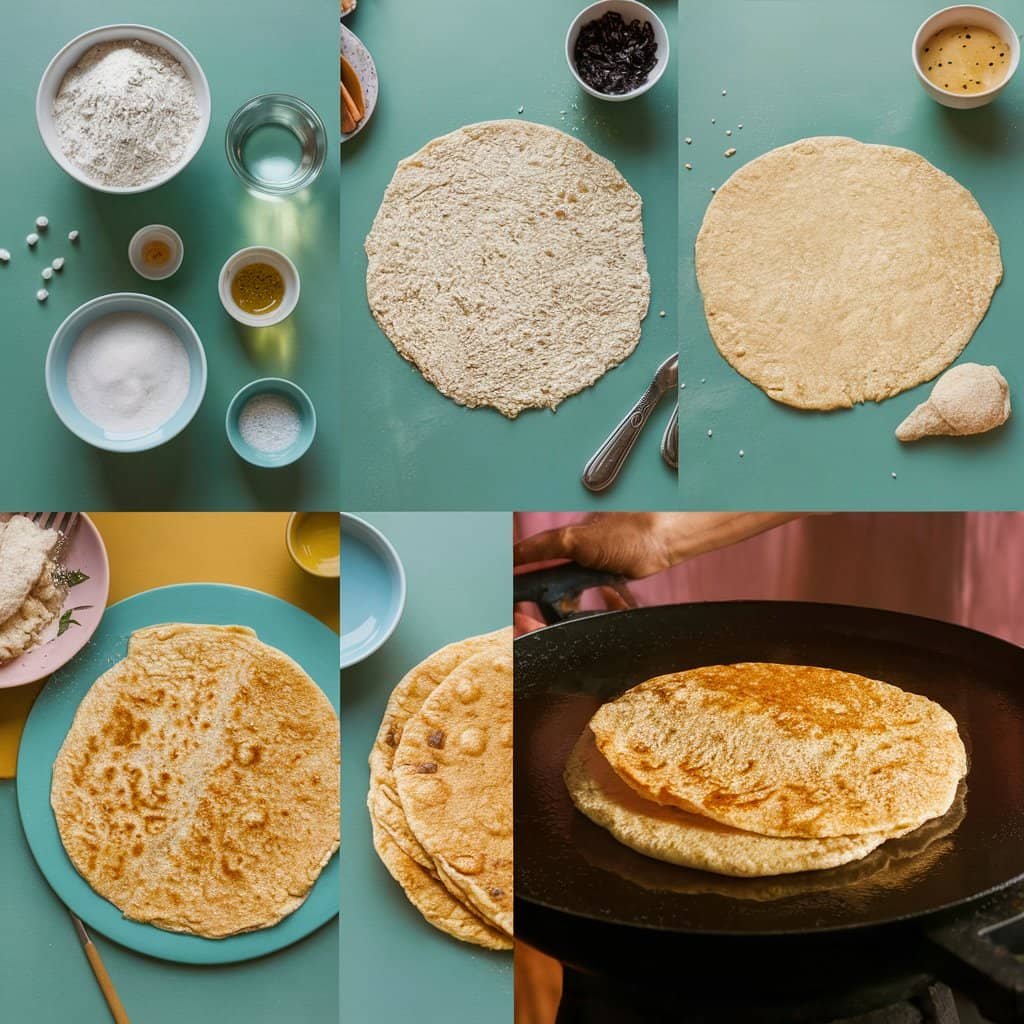
Ingredients and Directions

Roti Recipe
Course: MainCuisine: IndianDifficulty: Easy10
servings20
minutes15
minutes100
kcalTo make roti, you’ll need:
Ingredients
2 cups of whole wheat flour (atta)
1 cup of water
1/2 teaspoon of salt
1 tablespoon of oil (optional)
Directions
- In a large bowl, combine the whole wheat flour and salt. Mix well.
- Gradually add water to the flour mixture, kneading as you go, until a soft and pliable dough forms. If the dough feels too sticky, add a little more flour; if it’s too dry, add a bit more water.
- Once the dough comes together, knead it on a lightly floured surface for about 5 minutes until it becomes smooth and elastic.
- Cover the dough with a damp cloth and let it rest for 15-20 minutes. This resting period allows the gluten to relax, making the dough easier to roll out.
Rolling and Cooking the Roti Recipe
- Divide the dough into 8-10 equal portions, depending on the desired size of your roti.
- Roll each portion into a ball and flatten it slightly with your palm.
- On a lightly floured surface, use a rolling pin to roll out each flattened ball into a round shape, about 6 inches in diameter. Don’t worry if they’re not perfectly round; the charm of homemade roti lies in its rustic appearance.
- Heat a tawa (Indian griddle) or a non-stick pan over medium heat.
- Place the rolled-out roti on the hot tawa and cook for about 30 seconds, or until small bubbles start to form on the surface.
- Flip the roti and cook the other side for another 30 seconds.
- Using tongs, remove the roti from the tawa and place it directly on the flame of your gas stove. The roti will puff up and develop a few charred spots, which add to its flavor and texture. If you don’t have a gas stove, you can skip this step and continue cooking the roti on the tawa until it’s fully cooked and has a few brown spots on both sides.
- Remove the roti from the heat and brush it with a little oil or ghee (clarified butter) if desired. This adds a rich flavor and keeps the roti soft and pliable.
- Repeat the process with the remaining dough balls until all the rotis are cooked.
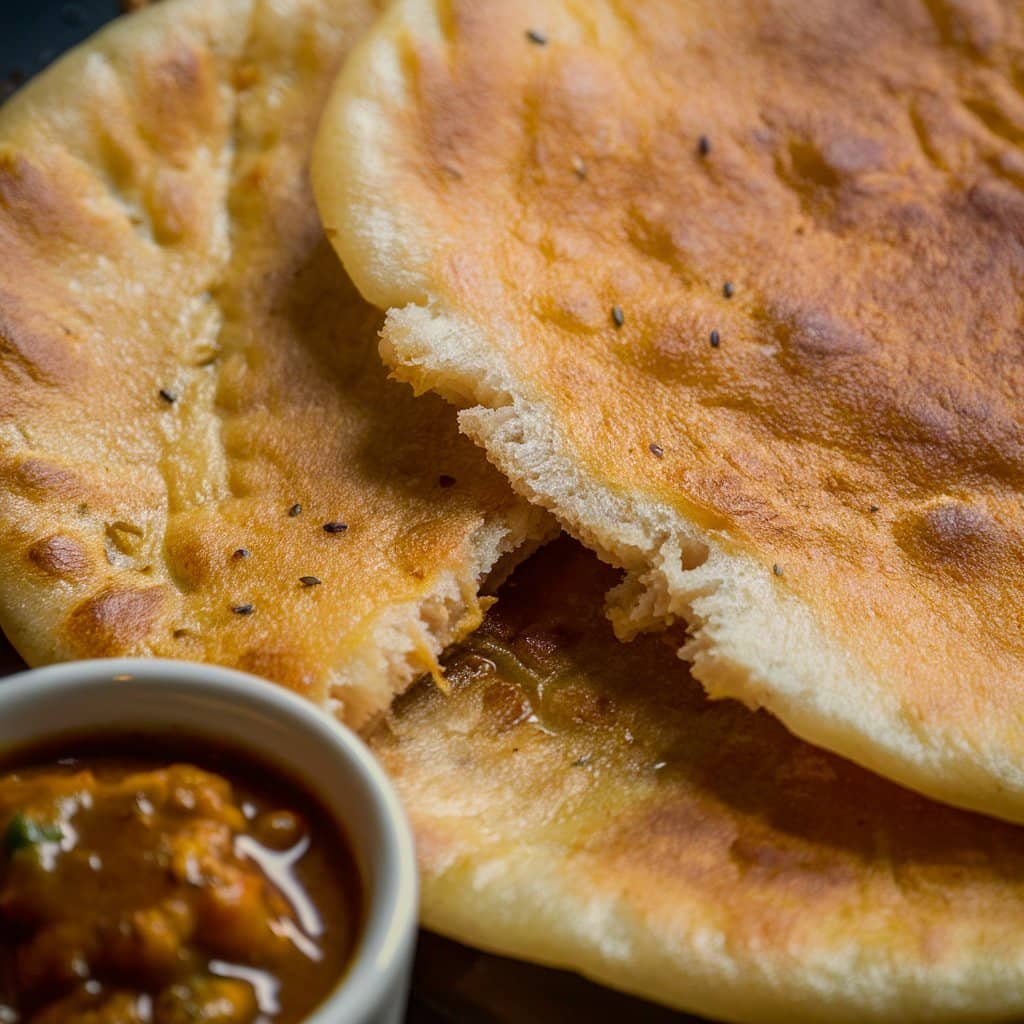
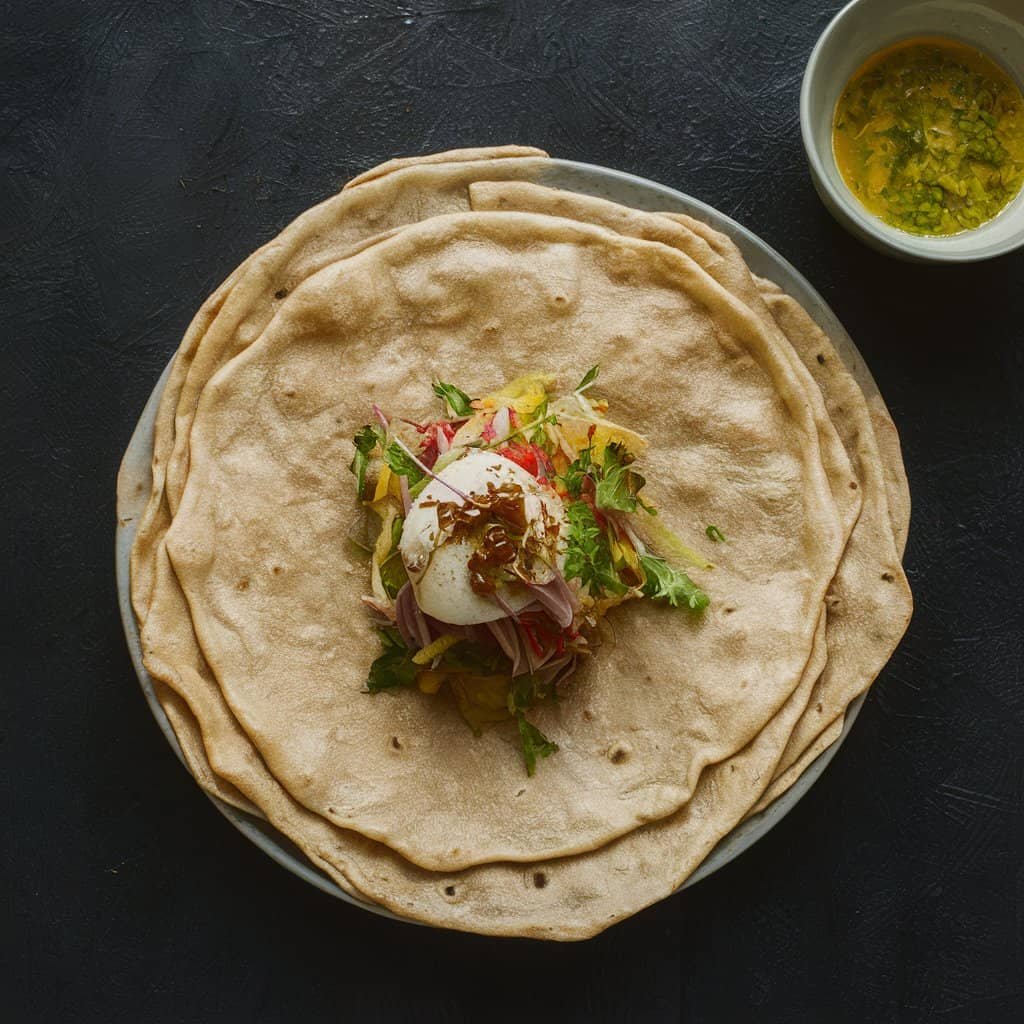
Serving Suggestions: Roti Recipe
Roti is incredibly versatile and can be enjoyed with a variety of dishes. Here are a few serving suggestions:
- Serve with curries, such as chana masala (chickpea curry), palak paneer (spinach and cottage cheese), or aloo gobi (potato and cauliflower).
- Pair with dal (lentil soup) for a comforting and nutritious meal.
- Use as a wrap for your favorite fillings, such as spiced potatoes, paneer (cottage cheese), or grilled vegetables.
- Enjoy with a dollop of butter or ghee and a sprinkle of sugar for a simple and satisfying snack.
Tips for Perfect Roti Recipe
- Use whole wheat flour (atta) for the most authentic taste and texture. All-purpose flour can be used, but the roti won’t have the same wholesome flavor.
- Knead the dough well to develop the gluten, which helps in creating a soft and pliable texture.
- Don’t skip the resting period, as it makes the dough easier to roll out and results in softer rotis.
- Roll the roti evenly, applying gentle pressure to ensure uniform thickness.
- Cook the roti on a well-heated tawa or pan to achieve the perfect balance of crispy and soft texture.
- Experiment with different flours, such as adding a little chickpea flour (besan) or millet flour for a unique flavor and nutritional boost.

Conclusion
Making perfect roti at home is an art that can be mastered with practice and patience. By following this step-by-step guide, you’ll be able to create soft, fluffy, and delicious rotis that will impress your family and friends. Don’t be discouraged if your first few attempts don’t turn out perfect; with time and experience, you’ll be making rotis like a pro. So, grab your apron, and let’s start cooking! Share your roti-making experiences and favorite serving suggestions in the comments below.